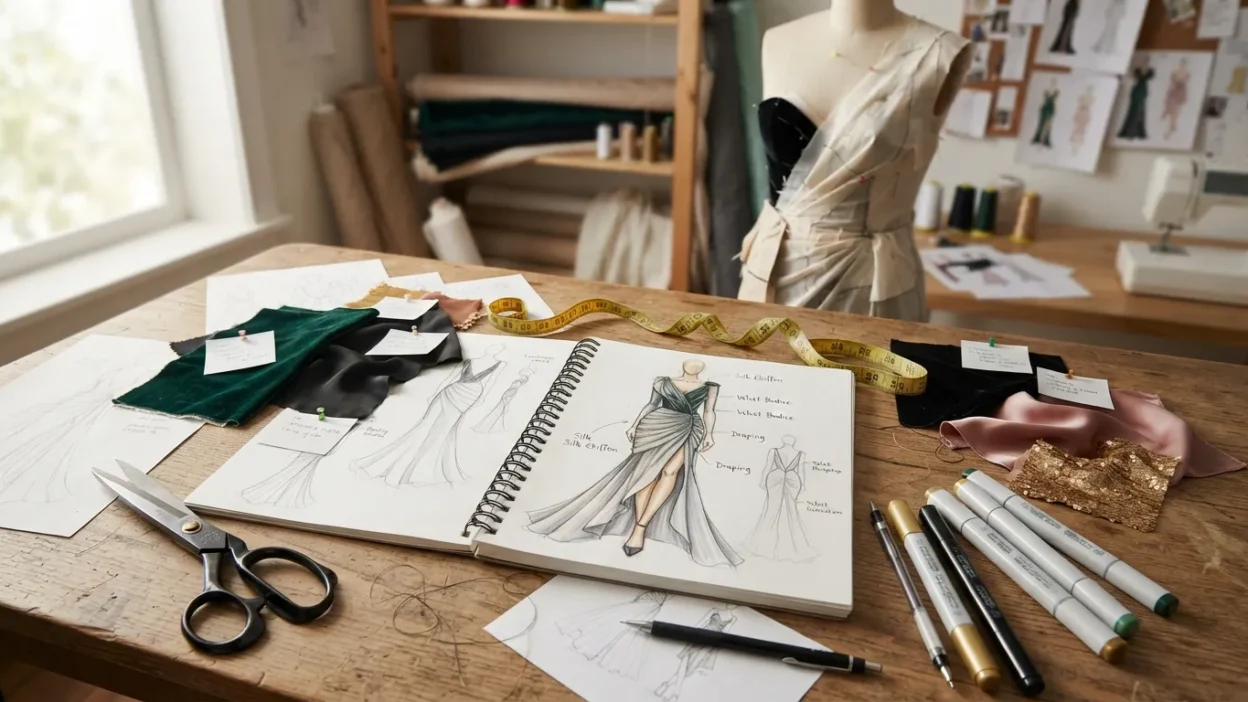
Have you ever looked at an outfit and thought, “I could design something better than this”? If so, you’re not alone — and learning how to design clothes is more accessible today than ever before. What once required years of formal training can now be pieced together through online courses, tutorials, and plain old hands-on practice.
Whether you’re dreaming of launching your own clothing brand, want to create custom pieces for yourself, or are simply curious about the creative process behind your favorite garments, fashion design is a skill anyone can develop with the right roadmap. It blends artistic vision with technical craft — sketching, fabric knowledge, pattern making, and construction all work together to turn an idea into something wearable.
This guide breaks down exactly how to design clothes, step by step, from your very first sketch to building a cohesive collection ready for the world to see.
Foundations: Building Your Design Sensibility
Before you sketch a single line, immerse yourself in fashion. Every great designer starts as a student of style, absorbing influences long before creating original work.
Study fashion history and eras. Understanding how silhouettes evolved — from the structured tailoring of the 1950s to the minimalism of the 90s — gives you a vocabulary to draw from. Even the most avant-garde designers borrow from the past.
Analyze runway shows, street style, and subcultures. Fashion doesn’t just live on the runway. Look at how real people style clothes, how subcultures create their own visual languages, and how trends move from niche communities into the mainstream.
Build mood boards and inspiration archives. Collect images, colors, textures, and references that excite you — whether on Pinterest, in a physical binder, or a dedicated app. Over time, patterns in what you save will reveal your natural aesthetic.
Identify your niche. Are you drawn to streetwear, minimalism, sustainable fashion, or couture-level craftsmanship? You don’t need to decide forever, but having a starting point focuses your early work and helps you develop a recognizable point of view.
Core Design Skills
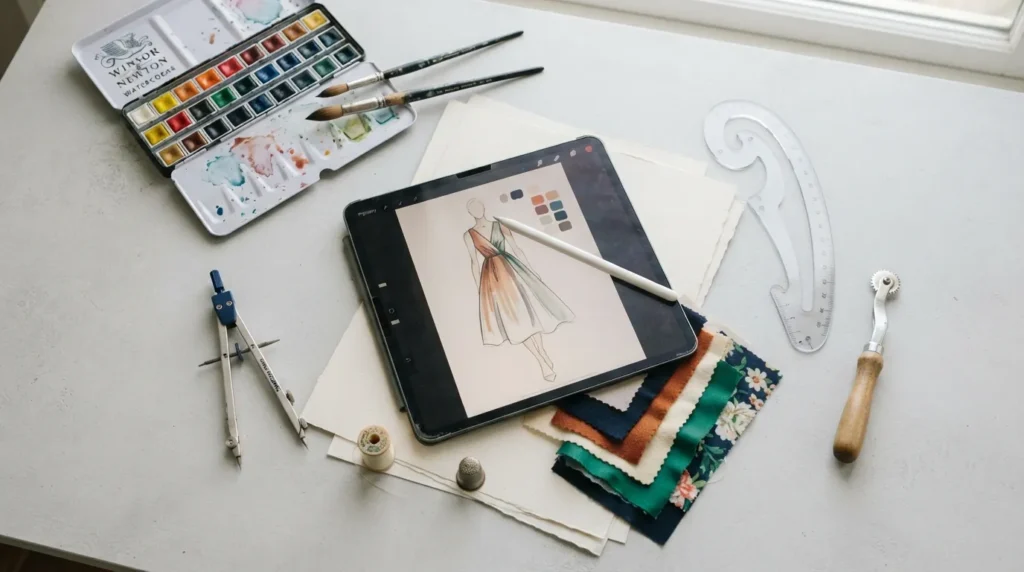
Once you have a sense of your aesthetic, it’s time to build the technical skills that let you translate ideas onto paper — and eventually, into fabric.
Fashion sketching (croquis). A croquis is a stylized human figure template used as the base for fashion sketches. Learning basic body proportions gives your sketches accuracy, even if your drawing style is loose or minimalist. Start with simple pencil sketches before adding color or detail.
Flat sketches vs. illustrative sketches. Flat sketches (technical drawings) show a garment without a body, focusing on construction details like seams and stitching — these are essential for communicating with pattern makers or manufacturers. Illustrative sketches, by contrast, capture mood and movement, useful for portfolios and presentations.
Digital tools. While hand-sketching remains valuable, many designers move to digital tools like Adobe Illustrator, Procreate, or 3D design software like CLO 3D, which lets you visualize garments on virtual models before cutting any fabric.
Color theory. Understanding complementary, analogous, and monochromatic color schemes helps you build cohesive palettes rather than relying on guesswork.
Silhouette, proportion, and balance. Learn how different shapes interact with the human body — an oversized top might need a fitted bottom, for example — to create visually balanced outfits.
Textiles and Materials
A design is only as good as the fabric that brings it to life. Understanding textiles is one of the most underrated skills in fashion design — and one that separates amateur work from professional-quality garments.
Fiber types: natural vs. synthetic. Natural fibers like cotton, wool, silk, and linen tend to breathe well and age with character, while synthetics like polyester and nylon often offer durability, stretch, or wrinkle resistance. Many modern fabrics blend both for the best of each.
Woven vs. knit fabrics. Wovens (like denim or poplin) are structured and hold their shape, making them ideal for tailored pieces. Knits (like jersey or rib) stretch and drape, better suited for casual or fitted garments. Choosing the wrong category for a design can completely change how it fits and moves.
Fabric weight, drape, and stretch. A heavy wool won’t behave the same way as a lightweight chiffon. Learning to “read” fabric — how it falls, moves, and holds structure — helps you match materials to your design intent before you ever cut into it.
Sourcing fabric. Local fabric stores are great for learning hands-on, while wholesalers and online suppliers offer better pricing for larger projects. Increasingly, designers are also seeking out sustainable and deadstock fabric sources to reduce waste.
Trims and notions. Buttons, zippers, interfacing, and thread might seem like small details, but they directly affect a garment’s durability and finish.
Garment Construction Fundamentals
Even if you eventually hire a pattern maker or seamstress, understanding construction basics will make you a far more capable designer. It’s the difference between sketching something that looks good and designing something that can actually be made.
Sewing basics every designer should know. You don’t need to be a master tailor, but understanding how a sewing machine works, how to thread it, and how to sew a straight, even seam is foundational. Many designers start with a beginner class or a series of online tutorials.
Seams, darts, hems, and closures. Seams join fabric pieces together; darts shape flat fabric around the body’s curves; hems finish raw edges; and closures like zippers, buttons, and snaps hold garments together. Knowing how each is used — and when — helps you design garments that are realistic to construct.
Hand-sewing vs. machine sewing. Machine sewing is faster and more durable for most garments, but hand-sewing still plays a role in finishing details, attaching delicate trims, or working with specialty fabrics.
Basic tools. A well-equipped beginner sewing kit includes fabric shears, pins, a measuring tape, a seam ripper, and ideally a dress form to test how garments sit on a body.
Pattern Making and Draping
Turning a sketch into a wearable garment requires a pattern — the blueprint that tells fabric how to become clothing. There are two primary methods designers use, often in combination.
Flat pattern making. This method involves drafting precise, flat templates using body measurements and mathematical formulas. It’s a systematic approach that works well for structured garments like blazers, trousers, or tailored dresses, where accuracy and repeatability matter most.
Draping. Draping involves pinning and manipulating fabric directly onto a dress form to sculpt a design in three dimensions. This method is especially useful for fluid, asymmetrical, or avant-garde designs where the fabric’s movement is part of the concept — something flat measurements alone can’t always capture.
Digital pattern-making software. Programs like Optitex, Gerber AccuMark, or even beginner-friendly tools like Seamly2D allow designers to create and adjust patterns digitally, speeding up revisions and making it easier to share files with manufacturers.
Grading patterns for multiple sizes. Once a pattern fits well in one size, it needs to be “graded” — proportionally adjusted — to create a consistent size range. This is a technical skill often outsourced to specialists as a brand scales.
Commercial vs. original patterns. Beginners often start with commercial patterns (like Simplicity or McCall’s) to learn construction, before progressing to drafting fully original patterns as their skills grow.
Prototyping and Fit
Before cutting into your final fabric, every experienced designer tests their pattern first. Skipping this step is one of the most common — and costly — mistakes beginners make.
Making a muslin/toile. A muslin (or toile) is a test garment sewn from inexpensive fabric, used purely to check fit, proportion, and construction before committing to your final materials. Because muslin fabric is cheap, mistakes here cost far less than mistakes made on expensive fashion fabric.
Fitting sessions and adjustments. Once the muslin is sewn, try it on a body or dress form and evaluate how it moves, sits, and drapes. Note any pulling, gaping, or awkward proportions — these are the issues a pattern can’t reveal until it’s actually worn.
Common fit issues and how to solve them. Problems like a gaping neckline, tight armholes, or an uneven hem are usually traceable to specific pattern adjustments. Learning to diagnose these issues — rather than guessing — saves significant time as you refine your process.
Iterating between sketch, pattern, and prototype. Design is rarely linear. A single garment might go through several rounds of sketching, pattern revision, and muslin testing before it’s ready for final fabric. This back-and-forth is normal, not a sign of failure.
From Prototype to Final Garment
Once your muslin fits well and any adjustments are made, it’s time to bring the design to life in its final fabric. This stage is where precision really pays off.
Cutting final fabric. Before cutting, lay out your pattern pieces carefully, paying attention to the fabric’s grainline (the direction of the threads) to ensure the garment hangs correctly. For patterned fabrics, also check that motifs line up across seams — a detail that instantly signals quality.
Construction order. Garments are built in a specific sequence — for example, darts before side seams, and collars before sleeves — to keep the process efficient and avoid having to sew around already-finished sections. Following a logical order prevents unnecessary rework.
Pressing and finishing details. Pressing seams as you sew (not just at the end) creates crisp, professional-looking results. Finishing techniques — like understitching, edge stitching, or French seams — protect raw edges and give a garment a polished, long-lasting quality.
Quality control checkpoints. Before considering a piece finished, check for even stitching, secure closures, balanced hems, and overall symmetry. These final checks are what separate a homemade look from a professional one.
Designing a Cohesive Collection
A single well-made garment is a great achievement — but if your goal is a clothing line or brand, your pieces need to work together as a unified whole, not just a random assortment of items.
Concept development and storytelling. Strong collections usually start with a central idea or theme — a mood, a place, a memory, a cultural reference — that ties every piece together conceptually, not just visually. This narrative also becomes valuable marketing material later on.
Color palettes and fabric stories. Limiting your collection to a curated color palette and a consistent set of fabric types creates visual cohesion. A “fabric story” — the specific materials and textures used throughout — helps a collection feel intentional rather than scattered.
Balancing hero pieces vs. basics. Every collection needs standout “hero” pieces that capture attention (and often drive marketing), balanced with more wearable basics that support sales volume and everyday usability. Too many statement pieces can overwhelm buyers; too few can make a collection feel flat.
Sizing and merchandising considerations. Think early about the size range you’ll offer and how pieces will be presented together — as outfits, capsules, or standalone items — since this affects both production planning and how customers shop the collection.
Feedback and Iteration
No designer creates in a vacuum. Getting outside perspective on your work — even when it’s uncomfortable — is one of the fastest ways to improve and avoid costly mistakes later.
Getting critiques from mentors and communities. Sharing your sketches, prototypes, or finished garments with experienced designers, instructors, or online fashion communities can surface blind spots you’d never catch on your own. Look for specific, actionable feedback rather than just general praise.
User testing (wear tests). Have real people try on your garments and move around in them — sit, walk, raise their arms. Fit issues and comfort problems often only reveal themselves through actual wear, not just a fitting-room mirror check.
Revising designs based on feedback. Not every piece of feedback needs to be acted on, but patterns across multiple opinions are worth taking seriously. Treat early designs as drafts meant to evolve, not finished statements.
Building a portfolio. As you iterate and improve, document your process and final pieces through quality photography. A strong portfolio — showing both finished garments and your design process — becomes essential whether you’re applying to fashion school, seeking a job, or attracting customers to your own brand.
The Business Side of Fashion Design
Designing great clothes is only half the equation — turning that skill into a sustainable venture requires understanding the business fundamentals that many creatives overlook until it’s too late.
Costing and pricing garments. Every garment’s price should account for fabric, trims, labor, overhead, and profit margin — not just the cost of materials. Underpricing is one of the most common mistakes new designers make, often leading to unsustainable margins once the business scales.
Small-batch manufacturing vs. made-to-order. Small-batch production lowers per-unit costs but requires upfront capital and unsold inventory risk. Made-to-order models reduce waste and financial risk but typically come with higher per-unit costs and longer customer wait times. Many new brands start made-to-order before transitioning to small batches.
Working with factories and sample makers. As orders grow beyond what you can produce alone, finding reliable sample makers and manufacturers becomes essential. Building these relationships takes time, clear technical packs (detailed spec sheets), and often several rounds of samples before production quality is right.
Sourcing at scale. Buying fabric and trims in bulk usually means working directly with mills or wholesale suppliers, which often have minimum order quantities (MOQs) far higher than what a single boutique fabric store requires.
E-commerce and marketplaces. Platforms like Shopify, Etsy, or marketplace apps let designers sell directly to consumers without needing a physical storefront, making it one of the most accessible ways to launch.
Marketing, branding, and audience building. A strong visual identity, consistent storytelling, and genuine engagement with your audience — often through social media — are frequently what determine a brand’s success as much as the clothing itself.
Legal basics. Understanding trademarks (to protect your brand name/logo), copyright limitations (fashion designs themselves are harder to copyright than logos or prints), and clear contracts with manufacturers or collaborators protects you as your business grows.
Tools, Resources, and Education
There’s no single “right” path into fashion design — designers today build their skills through a mix of formal education, self-teaching, and hands-on experimentation.
Online courses and certifications. Platforms like Skillshare, Coursera, and specialized fashion education sites offer courses on everything from sketching to pattern making to small business fundamentals, often at a fraction of the cost of a traditional degree.
Fashion schools vs. self-taught paths. A formal fashion degree offers structured training, industry connections, and access to technical resources like draping studios — valuable for some career paths, particularly at established fashion houses. But many successful designers are entirely self-taught, building skills through practice, tutorials, and real-world trial and error.
Software and apps worth learning. Beyond Adobe Illustrator and Procreate for sketching, tools like CLO 3D (for 3D garment visualization) and Seamly2D (for digital pattern making) are increasingly valuable as the industry moves toward digital workflows.
Communities, forums, and networking events. Local sewing meetups, fashion industry Slack groups, trade shows, and online forums connect designers with peers, mentors, and potential collaborators — relationships that often prove just as valuable as technical skills.
Common Mistakes Beginners Make
Learning from others’ missteps can save you significant time, money, and frustration as you develop your own design process.
Skipping the muslin/prototype stage. It’s tempting to cut straight into expensive fabric when you’re excited about a design, but skipping the test-garment stage often means costly fit problems discovered too late to fix affordably.
Underestimating fabric costs. New designers frequently budget for the fabric itself but forget trims, shrinkage allowances, pattern matching waste, and the extra yardage needed for larger sizes — all of which add up quickly.
Designing without considering construction feasibility. A sketch might look stunning on paper, but if the construction required is unrealistic — structurally, financially, or with your current skill level — it can stall a project indefinitely. The best designers learn to think about “buildability” while they sketch, not after.
Ignoring sizing and fit diversity. Designing only for one body type limits your potential audience and can create costly grading problems later. Considering a range of body shapes early — even if you start with just a few sizes — makes scaling much smoother down the line.
Conclusion
Learning how to design clothes is a journey that blends artistic vision with hands-on technical craft — from your first rough sketch to a finished garment someone actually wears. Along the way, you’ll develop an eye for color and silhouette, hands-on skills in construction and pattern making, and eventually, an understanding of the business side that turns creativity into a sustainable practice.
There’s no single “right” path into fashion design. Some designers start in formal programs; others teach themselves entirely through tutorials, trial, and error. What matters most is starting — sketching your first idea, sewing your first seam, making your first mistake, and learning from it.
Every experienced designer began exactly where you are now. Start small, stay consistent, and let your unique aesthetic emerge naturally through practice. The clothes you imagine today could be the pieces someone wears tomorrow.
Ready to begin? Pick up a pencil, sketch your first design, or join a local sewing class this week — your fashion design journey starts with a single step.