You glance at a photo and notice your smile looks a shade more yellow than you remember. Maybe it’s the morning coffee, the evening tea, or simply the years adding up. Whatever the cause, tooth stains are one of the most common cosmetic concerns, and the good news is that many of them can be improved.
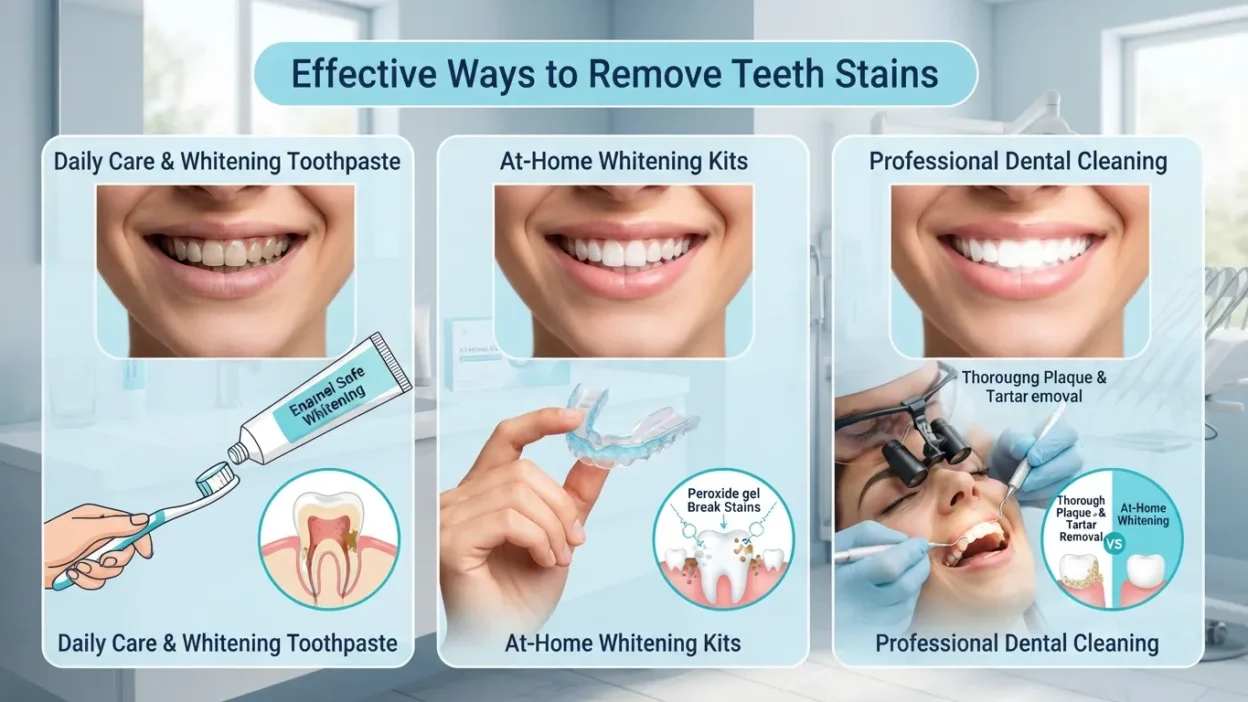
So, how do you remove stains from teeth? Surface stains from food, drinks, and tobacco can often be lifted with whitening toothpaste, better brushing habits, and a professional cleaning. Deeper stains inside the tooth usually need professional whitening or cosmetic treatment.
In this guide, you’ll learn what causes teeth stains, how to tell the types apart, which home remedies work (and which to avoid), what your dentist can offer, and how to keep your smile brighter for longer.
Key Takeaways
- Teeth stains fall into two main types: extrinsic (on the surface) and intrinsic (inside the tooth).
- Surface stains from coffee, tea, wine, and tobacco often respond well to whitening toothpaste, good brushing, and professional cleaning.
- Deeper stains from aging, medication, or trauma usually need professional whitening or cosmetic treatment.
- Harsh DIY remedies, like lemon juice or daily baking soda, can damage enamel and make teeth look worse over time.
- Prevention matters as much as removal: rinse after staining drinks, brush gently, and keep up regular dental visits.
Understanding Teeth Stains
Before choosing a treatment, it helps to know what you’re dealing with. Not all stains are the same, and the right fix depends on where the stain sits and what caused it.
How Teeth Get Stained
Each tooth has three layers that matter here:
- Enamel: the hard, outer shell. It looks smooth, but under a microscope it’s full of tiny pores and ridges where pigments can settle.
- Pellicle: a thin, protein-based film that forms on your teeth within minutes of brushing. It protects enamel, but it also grabs onto color from food and drinks.
- Dentin: the softer, naturally yellowish layer beneath the enamel. When enamel thins or becomes discolored, dentin shows through.
Stains develop when pigments attach to the pellicle or enamel, or when the inner structure of the tooth changes color.
Extrinsic Stains
Extrinsic stains sit on the outer surface of the tooth. They’re the most common type and the easiest to treat.
Typical causes:
- Coffee, tea, red wine, and cola
- Dark sauces and berries
- Smoking and chewing tobacco
- Plaque and tartar buildup
What they look like: yellow, brown, or black discoloration, often most visible near the gumline or between teeth.
Good news: a thorough cleaning and a consistent whitening routine can often lift them.
Intrinsic Stains
Intrinsic stains form inside the tooth, within the enamel or dentin. Because the color is part of the tooth structure, brushing alone won’t remove it.
Typical causes:
- Certain medications, such as tetracycline antibiotics taken during tooth development
- Excess fluoride during childhood (fluorosis)
- Dental trauma that darkens a tooth
- Tooth decay or old fillings
- Genetic or developmental enamel conditions
What they look like: gray, brown, or bluish tones, white or brown spots, or a single tooth that is darker than the rest.
Treatment: these usually require professional options like in-office whitening, bonding, or veneers.
Age-Related Stains
Age-related staining is a combination of both types. Over the years, enamel gradually wears thinner, which lets the yellow dentin underneath show through. At the same time, a lifetime of coffee, tea, and other staining habits builds up surface stains.
This is why teeth often look more yellow with age, even with excellent oral hygiene. The good news is that professional whitening often works well for this type of yellowing.
Quick Comparison: Extrinsic vs. Intrinsic Stains
| Extrinsic Stains | Intrinsic Stains | |
|---|---|---|
| Location | Tooth surface | Inside the tooth |
| Common causes | Food, drinks, tobacco, plaque | Medications, fluorosis, trauma, decay |
| Typical colors | Yellow, brown, black | Gray, brown, white spots |
| Home treatment works? | Often yes | Usually limited |
| Best treatment | Whitening toothpaste, cleaning | Professional whitening, bonding, veneers |
Common Causes of Teeth Stains
Stains rarely come from just one thing. Most people have a mix of causes, from daily habits to factors they can’t control. Here are the most common ones.
1. Foods and Drinks
What you eat and drink is the biggest cause of surface stains. Two things make a food or drink likely to stain: strong pigments (called chromogens) and acidity, which softens enamel slightly and makes it easier for color to stick.
Common culprits:
- Coffee and tea: Both contain tannins, which help pigments cling to enamel. Black tea can stain even more than coffee.
- Red wine: It combines deep color, acid, and tannins, which makes it especially stain-prone.
- Cola and dark sodas: The dark color and high acidity work together, and even clear sodas can weaken enamel.
- Berries and dark fruit juices: Blueberries, blackberries, cherries, and pomegranate juice are all heavily pigmented.
- Sauces: Tomato sauce, soy sauce, balsamic vinegar, and curry can leave color behind.
- Sports and energy drinks: Acidic formulas can soften enamel and make staining easier.
You don’t need to give these up. Rinsing with water afterward and not sipping slowly all day makes a real difference.
2. Tobacco and Smoking
Tobacco is one of the most stubborn causes of discoloration. Nicotine and tar in cigarettes, cigars, and chewing tobacco are naturally dark and stick to enamel quickly.
- Nicotine is colorless at first, but turns yellow when exposed to oxygen.
- Tar leaves brown and black stains that build up over time.
- Stains often settle in the grooves of teeth and along the gumline.
Smokers’ stains can also be deeper because the pigments work into microscopic pits in the enamel. Professional cleanings help, but quitting is the only way to stop new staining.
3. Poor Oral Hygiene
When brushing and flossing fall short, plaque builds up on teeth. Plaque is a sticky film of bacteria that can look yellowish by itself, and it traps pigments from food and drinks.
If plaque isn’t removed, it hardens into tartar (calculus), which:
- Has a rough surface that collects even more stains
- Can look yellow, brown, or dark
- Can only be removed by a dentist or hygienist, not by brushing
Missing areas like the gumline, the back teeth, and between teeth is a common reason stains keep returning.
4. Medications
Some medications can change the color of teeth, especially when taken while teeth are still developing.
- Tetracycline and doxycycline: Taken in early childhood (or by a mother during pregnancy), these antibiotics can cause gray, brown, or banded discoloration inside the tooth.
- Antihistamines and some blood pressure medications: These may contribute to staining, often by causing dry mouth, which reduces saliva’s natural cleaning effect.
- Chlorhexidine mouthwash: A prescription rinse that can leave brown surface stains with long-term use.
- Iron supplements: Liquid forms in particular can leave dark marks on teeth.
If you think a medication is affecting your teeth, talk to your doctor or dentist rather than stopping it on your own.
5. Medical and Genetic Factors
Some people are simply more prone to discoloration because of how their teeth developed.
- Fluorosis: Too much fluoride during childhood can cause white streaks or brown spots on the enamel.
- Enamel defects: Conditions like amelogenesis imperfecta cause thin or poorly formed enamel, so the darker dentin shows through.
- Illness in early life: High fevers or serious infections during tooth formation can leave lasting marks.
- Natural tooth color: Some people naturally have darker or more yellow dentin, regardless of habits.
These causes are not the result of poor hygiene, which is worth saying clearly for readers who feel self-conscious.
6. Dental Trauma and Old Dental Work
- Trauma: A knock to a tooth can damage the nerve or cause internal bleeding, and the tooth may turn gray, pink, or dark over time. A single darkened tooth is a sign to see a dentist.
- Root canal treatment: Teeth that have had root canals can darken gradually as the inside of the tooth changes.
- Old fillings: Silver amalgam fillings can cast a gray shadow through the surrounding tooth. Older composite fillings can also stain at the edges.
- Tooth decay: Brown or black spots can be early cavities, not stains, which is why it’s worth getting them checked.
7. Aging
As we get older, enamel wears down from years of chewing, brushing, and acid exposure. This thinner enamel lets the naturally yellow dentin show through. Meanwhile, decades of exposure to staining foods and drinks add surface discoloration on top.
This combination explains why teeth tend to look darker or more yellow in later life, even for people with good habits.
Summary: Cause and Stain Type
| Cause | Usually Creates | Stain Type |
|---|---|---|
| Coffee, tea, wine, dark foods | Yellow or brown surface stains | Extrinsic |
| Smoking and tobacco | Yellow to dark brown or black | Extrinsic (can become deeper) |
| Plaque and tartar | Yellow or brown buildup | Extrinsic |
| Medications in childhood | Gray or brown bands | Intrinsic |
| Fluorosis | White or brown spots | Intrinsic |
| Trauma or root canal | One dark or gray tooth | Intrinsic |
| Aging | Overall yellowing | Both |
How to Identify Your Stain Type
Knowing what kind of stain you have helps you pick the right treatment and avoid wasting time or money on products that won’t work. You can learn a lot with a simple self-check at home, though a dentist is the only one who can confirm what’s really going on.
Step 1: Do a Quick Self-Check
Stand in front of a bathroom mirror with good natural light, and follow these steps:
- Brush and floss first. This removes loose plaque and food debris so you’re looking at the actual stain.
- Look at all your teeth, not just the front ones. Check the back teeth, the gumline, and between teeth.
- Note the pattern. Is the discoloration all over, in streaks, in spots, or on just one tooth?
- Note the color. Use the guide below.
- Try gentle brushing with whitening toothpaste for a week or two. If the color fades, it was likely a surface stain.
Step 2: Match the Color to the Likely Cause
| Color / Appearance | Likely Cause | Likely Type |
|---|---|---|
| Light yellow, all over | Natural dentin color, thinning enamel, or aging | Intrinsic or age-related |
| Yellow near the gumline | Plaque buildup | Extrinsic |
| Light to dark brown | Coffee, tea, wine, tobacco, or tartar | Extrinsic |
| Dark brown or black spots | Heavy tobacco use, tartar, or possible decay | Extrinsic or a cavity |
| Gray or bluish-gray | Medication (such as tetracycline), trauma, or a root canal | Intrinsic |
| White spots or streaks | Fluorosis, early enamel changes, or enamel defects | Intrinsic |
| One tooth darker than the rest | Trauma, nerve damage, or a past root canal | Intrinsic |
| Dark edges around a filling | Old or leaking filling, or decay | Intrinsic or a dental problem |
| Banded or striped pattern | Medication or illness during tooth development | Intrinsic |
Step 3: Use These Clues to Narrow It Down
It’s probably an extrinsic (surface) stain if:
- The color is mostly yellow or brown
- It’s heavier on the teeth you use most or near the gumline
- It has gotten worse with coffee, tea, wine, or smoking
- It lightens after a professional cleaning or a few weeks of whitening toothpaste
It’s probably an intrinsic (internal) stain if:
- The color is gray, bluish, or banded
- It has been there for as long as you can remember
- It affects one tooth only, or follows a pattern across several teeth
- It doesn’t improve with brushing, cleaning, or over-the-counter whitening
- You have a history of trauma, a root canal, or certain childhood medications
Step 4: Rule Out Things That Are Not Stains
Some discoloration is not a stain at all, and treating it like one can delay important care.
- Cavities: Brown or black spots, especially in the grooves of back teeth or between teeth, may be decay. These need a filling, not a whitener.
- Tartar: Hard, crusty yellow or brown deposits along the gumline can’t be brushed off and need a professional cleaning.
- Enamel erosion: Teeth that look yellow, glassy, or sensitive may have lost enamel to acid, which whitening can make worse.
- Early decay: Chalky white spots near the gumline can be early demineralization, not a cosmetic issue.
When Self-Checking Isn’t Enough
See a dentist if you notice:
- A single tooth changing color suddenly
- Dark spots that feel soft, rough, or sensitive
- Discoloration with pain, swelling, or a bad taste
- Stains that don’t respond to any home care
- Uncertainty about what’s causing the color change
A short visit can save you months of trial and error, and it can catch problems early.
Note: This guide is for general information only. It’s not a diagnosis, and only a dentist can accurately identify the cause of tooth discoloration.
Home Methods to Remove Stains from Teeth
Home care works best on extrinsic (surface) stains. If your discoloration is gray, banded, or limited to one tooth, these methods probably won’t change it much. For each method below, you’ll find how to do it, how well it works, and what to watch out for.
1. Brush Properly
Technique matters more than most people realize. Many stains stick around because certain areas get missed.
How to do it:
- Brush twice a day for two minutes with a soft-bristled brush.
- Hold the brush at a 45° angle toward the gumline and use gentle circular motions.
- Cover every surface: outer, inner, and chewing surfaces.
- Wait about 30 minutes after acidic foods or drinks before brushing, since enamel is temporarily softer.
Effectiveness: Good for preventing stains and removing fresh ones. It won’t lift deep or old discoloration.
Watch out for: Hard bristles and heavy pressure wear down enamel and gums, which can make teeth look more yellow over time.
2. Whitening Toothpaste
Whitening toothpastes remove surface stains with mild abrasives and polishing agents. Some also contain low levels of peroxide or enzymes.
How to do it: Use it twice daily in place of your regular toothpaste.
What to look for:
- The ADA Seal of Acceptance (or your country’s equivalent)
- Fluoride, so you protect enamel while whitening
- Low to moderate abrasiveness (some brands list a RDA or abrasivity value)
Effectiveness: Typically lightens teeth by a small amount over 2 to 6 weeks by removing surface stains. It won’t change the natural color of the tooth.
Watch out for: Highly abrasive “stain removal” formulas used daily can wear enamel. If you notice sensitivity, switch to a gentler product.
3. Electric Toothbrush vs. Manual
Studies generally show that electric brushes, especially oscillating-rotating and sonic models, remove more plaque than manual brushes. Since plaque traps stains, this can help keep teeth brighter.
How to do it: Let the brush do the work. Guide it slowly from tooth to tooth without scrubbing.
Effectiveness: Moderate. It’s most helpful for people who brush too quickly or too hard.
Watch out for: Using a worn-out brush head or pressing too hard. Replace heads every three months.
4. Baking Soda
Baking soda is a mild abrasive that can help lift surface stains, and many toothpastes include it.
How to do it:
- Mix about half a teaspoon of baking soda with a few drops of water to form a loose paste.
- Brush gently for up to a minute, then rinse well.
- Limit use to once or twice a week.
Effectiveness: Modest. It helps with light surface stains, but the results are subtle.
Watch out for: Rough or gritty mixtures and daily use can wear enamel over time. It also doesn’t contain fluoride, so it shouldn’t replace your regular toothpaste.
5. Hydrogen Peroxide Rinse
Hydrogen peroxide is a common whitening ingredient, and a diluted rinse can lighten teeth slightly.
How to do it:
- Use 3% hydrogen peroxide (the standard drugstore strength) and dilute it half and half with water.
- Swish for 30 to 60 seconds, then spit and rinse your mouth with plain water.
- Use it only occasionally, not daily.
Effectiveness: Mild. Contact time is short, so results are limited compared to strips or professional products.
Watch out for: Gum irritation, sensitivity, and swallowing it. Never use stronger concentrations at home. Skip it if you have gum disease, open sores, or sensitive teeth.
6. Whitening Strips
Strips are among the most effective at-home options. They hold a peroxide gel against the teeth for a set time.
How to do it:
- Follow the product’s instructions exactly. Most are used for about 30 minutes a day for 1 to 2 weeks.
- Make sure teeth are clean and dry before applying.
- Keep the strip off your gums as much as possible.
Effectiveness: Often visibly lighter in a few days to two weeks, and results can last for several months.
Watch out for: Sensitivity and gum irritation are common. Don’t overuse them, and don’t stack multiple whitening products at the same time. Strips only whiten the front teeth they cover, and they won’t change the color of fillings, crowns, or veneers.
7. Whitening Mouthwash
Whitening rinses contain a small amount of peroxide or other whitening agents.
How to do it: Swish for the time listed on the label (usually 60 seconds), once or twice a day.
Effectiveness: Subtle. Since the rinse only touches your teeth briefly, it works better as a maintenance step than as a primary treatment, and results may take a few weeks to months.
Watch out for: Alcohol-based formulas can dry your mouth, which actually makes staining easier. Look for an alcohol-free option.
8. LED Whitening Kits
These kits pair a whitening gel with a blue LED light mouthpiece.
How to do it: Follow the kit directions, which usually involve 10 to 30 minutes a day over one to two weeks.
Effectiveness: Results do occur, but they mostly come from the peroxide gel. Evidence that the LED light adds much benefit is limited.
Watch out for: Sensitivity and gum irritation, and overpaying for the light. Check that the gel is from a reputable brand.
9. Oil Pulling
Oil pulling is an old practice of swishing oil, usually coconut oil, in the mouth.
How to do it:
- Swish one tablespoon of oil for 10 to 15 minutes, then spit it into the trash (not the sink, since it can clog pipes).
- Rinse and brush as usual.
Effectiveness: Research is limited. It may help reduce some bacteria and plaque, but there’s little reliable evidence that it whitens teeth or removes stains.
Watch out for: Don’t use it as a replacement for brushing, flossing, or professional care, and don’t swallow the oil.
10. Crunchy Fruits and Vegetables
Foods like apples, carrots, celery, and cucumbers stimulate saliva and add mild scrubbing action as you chew.
How to do it: Add them to meals and snacks, especially at the end of a meal.
Effectiveness: Supportive but small. Think of this as a stain-prevention habit, not a stain remover. The popular claim that rubbing strawberries or pineapple on teeth whitens them isn’t supported by good evidence.
Watch out for: Acidic fruits can soften enamel when eaten constantly throughout the day.
11. Floss and Clean Between Teeth
Stains and plaque often build up in spaces your brush can’t reach.
How to do it:
- Floss or use interdental brushes or a water flosser once a day.
- Curve the floss around each tooth and slide it gently below the gumline.
Effectiveness: Doesn’t whiten teeth directly, but it prevents the buildup that leads to staining and tartar between teeth.
Watch out for: Snapping floss into the gums. Be gentle, and mention persistent bleeding to your dentist.
12. Rinse with Water After Staining Foods and Drinks
This is one of the easiest habits to build.
How to do it:
- Swish with plain water after coffee, tea, wine, soda, or dark sauces.
- Use a straw for iced drinks so liquid bypasses the front teeth.
- Avoid sipping staining drinks slowly over hours.
Effectiveness: It won’t remove existing stains, but it reduces how much pigment sticks to teeth.
Watch out for: Brushing immediately after acidic drinks. Rinse first, then brush after about 30 minutes.
Home Methods at a Glance
| Method | How Fast | Effectiveness | Typical Cost | Main Caution |
|---|---|---|---|---|
| Proper brushing | Ongoing | Prevents and lifts light stains | Low | Don’t brush too hard |
| Whitening toothpaste | 2 to 6 weeks | Mild | Low | Avoid highly abrasive types |
| Electric toothbrush | Ongoing | Mild to moderate | Medium | Replace heads regularly |
| Baking soda | 2 to 4 weeks | Mild | Very low | Limit to once or twice a week |
| Hydrogen peroxide rinse | 2 to 4 weeks | Mild | Very low | Dilute properly, don’t swallow |
| Whitening strips | Days to 2 weeks | Moderate to high | Medium | Sensitivity, gum irritation |
| Whitening mouthwash | Weeks to months | Mild | Low | Choose alcohol-free |
| LED kits | 1 to 2 weeks | Moderate (from the gel) | Medium to high | Light adds little |
| Oil pulling | Unproven | Very limited | Very low | Not a replacement for brushing |
| Crunchy produce | Ongoing | Supportive only | Low | Acidic fruits in excess |
| Flossing | Ongoing | Prevents stains | Low | Be gentle |
| Water rinse | Immediate | Prevents new stains | Free | Wait to brush after acid |
When Home Methods Aren’t Enough
If you’ve followed a consistent routine for 3 to 4 weeks and see little change, the stain is likely intrinsic or tartar-related. At that point, a professional cleaning or evaluation will save you time and avoid overuse of whitening products.
Natural Remedies: Myths vs. Facts
Search for “natural teeth whitening” and you’ll find dozens of kitchen-cabinet tricks. Some are harmless but ineffective, and a few can actually damage your teeth. Here’s what the evidence says about the most popular ones.
1. Lemon Juice and Orange Peel
The claim: Citrus acid “bleaches” stains, and rubbing orange peel on your teeth whitens them.
The reality: Citric acid doesn’t whiten teeth. What it does is dissolve minerals in enamel, which creates a rough, thinner surface. Any short-term brightness comes from enamel damage, and as enamel thins, the yellow dentin underneath shows through more. The result is teeth that look more yellow over time and are more sensitive.
Verdict: Avoid. Lemon juice is one of the riskiest DIY remedies. Orange peel is less acidic, but there’s no good evidence that it whitens.
2. Activated Charcoal
The claim: Charcoal “absorbs” stains and toxins from teeth.
The reality: Charcoal is abrasive. It may scrub off a little surface color, but there’s no solid evidence that it whitens teeth, and its abrasiveness can wear enamel. The black powder can also settle in cracks, along the gumline, and in the margins of fillings and crowns. Most charcoal products don’t contain fluoride.
Verdict: Not recommended. The dental community generally advises against it, and the American Dental Association has not given charcoal toothpastes its Seal of Acceptance.
3. Apple Cider Vinegar
The claim: Its acidity dissolves stains and kills bacteria.
The reality: Like lemon juice, apple cider vinegar is acidic enough to erode enamel. Lab studies have shown it can soften and damage tooth surfaces, and there’s little reliable evidence for real whitening. Vinegar is also slow to rinse away from the grooves of teeth.
Verdict: Avoid. If you use it in cooking or drink it diluted, rinse with water afterward and don’t brush right away.
4. Strawberries and Baking Soda
The claim: Malic acid in strawberries breaks down stains, and baking soda scrubs them off.
The reality: A small study found this mixture didn’t whiten teeth in any meaningful way. Strawberries contain acids and sugar, and the seeds can get stuck in your teeth. The baking soda adds some mild abrasion, but not enough to justify the mess.
Verdict: Skip. It’s harmless in small amounts, but it won’t deliver results.
5. Turmeric
The claim: Turmeric paste or turmeric-based toothpaste whitens teeth.
The reality: Turmeric is a well-known staining spice that can turn fabric, skin, and countertops yellow. Some people use it for its anti-inflammatory properties, but there’s no good evidence that it whitens teeth. Used as a paste, it may leave a yellow tint, at least temporarily.
Verdict: Not effective for whitening.
6. Banana Peel
The claim: Rubbing the inside of a banana peel on your teeth adds minerals that whiten them.
The reality: There’s no scientific support for this. Teeth can’t absorb minerals from a peel in any way that changes color.
Verdict: Harmless but ineffective.
7. Salt and Salt Scrubs
The claim: Salt acts as a natural scrub.
The reality: Coarse salt is abrasive and can scratch enamel and irritate gums. A mild saltwater rinse can soothe your mouth, but it won’t remove stains.
Verdict: Avoid scrubbing. A gentle rinse is fine for comfort only.
8. Coconut Oil Pulling
The claim: Swishing oil removes toxins and whitens teeth.
The reality: Covered in the previous section. Evidence for whitening is limited. Some studies suggest it may lower plaque and certain bacteria, but it doesn’t replace brushing or professional care.
Verdict: Low risk, little benefit for stains.
9. Aloe Vera and Herbal Toothpastes
The claim: Aloe vera and other plant-based products clean and whiten teeth naturally.
The reality: Aloe vera gels and herbal toothpastes can be gentle and pleasant to use, and some are fine for daily cleaning. However, few have strong evidence for stain removal, and many lack fluoride, which protects teeth from decay.
Verdict: Fine for gentle cleaning, but choose one with fluoride and don’t expect a whitening effect.
10. Eating Dairy, Cheese, and Crunchy Foods
The claim: Some foods help protect teeth from stains.
The reality: This one has some support. Cheese, plain yogurt, and milk can help buffer acids and supply calcium. Crisp fruits and vegetables increase saliva. These foods help protect teeth but won’t remove existing stains.
Verdict: Helpful habit for prevention.
Natural Remedies at a Glance
| Remedy | Common Claim | What Evidence Shows | Safe? |
|---|---|---|---|
| Lemon juice | Bleaches teeth | Erodes enamel, no whitening | ❌ Avoid |
| Orange peel | Whitens with citrus oils | No good evidence | ⚠️ Ineffective |
| Activated charcoal | Absorbs stains | Abrasive, no proven whitening | ❌ Not recommended |
| Apple cider vinegar | Dissolves stains | Erodes enamel | ❌ Avoid |
| Strawberry + baking soda | Breaks down stains | No meaningful whitening | ⚠️ Ineffective |
| Turmeric | Natural whitener | Can actually stain | ❌ Ineffective |
| Banana peel | Adds minerals | No evidence | ⚠️ Harmless, useless |
| Salt scrub | Scrubs stains | Abrasive, irritates gums | ❌ Avoid |
| Coconut oil pulling | Pulls out toxins | Limited evidence, may reduce plaque | ✅ Low risk |
| Aloe or herbal toothpaste | Gentle whitening | Mild cleaning, limited whitening | ✅ If it has fluoride |
| Dairy and crunchy foods | Protect teeth | Supports prevention | ✅ Helpful |
Why “Natural” Doesn’t Always Mean Safe
Teeth can’t regrow enamel once it’s lost. That’s why damage from acidic or abrasive remedies is permanent, while the “results” are often temporary or imaginary. A few signs a remedy may be hurting more than helping:
- New or increased tooth sensitivity
- Teeth that look more yellow, translucent, or glassy
- Rough spots or a gritty feel on the teeth
- Gum irritation or sores
If you notice any of these, stop the remedy and talk to your dentist.
The Better Approach
If you prefer a natural-leaning routine, these are safe and effective:
- Gentle, consistent brushing with fluoride toothpaste
- Rinsing with water after staining foods and drinks
- Eating crunchy produce and dairy
- Regular professional cleanings
Professional Treatments for Teeth Stains
When home methods stop working, or when you’re dealing with intrinsic stains, a dentist has options that are stronger, faster, and safer than anything on a store shelf. The right one depends on the type of stain, how severe it is, and your budget.
1. Professional Dental Cleaning (Scaling and Polishing)
What it is: A dentist or hygienist removes plaque and tartar with special instruments (scaling), then polishes the teeth with a gritty paste or a fine air-powder spray.
Best for: Surface stains from coffee, tea, tobacco, and tartar buildup.
What to expect:
- The visit usually takes 30 to 60 minutes.
- Teeth often look noticeably brighter right away, because tartar and surface stain are physically removed.
- Many people feel mild gum tenderness afterward, which fades within a day or two.
Results last: Until stains and plaque build up again, which is why cleanings are recommended every six months (or as your dentist advises).
Limitations: A cleaning removes stains from the surface only. It doesn’t change the natural color of your teeth.
2. In-Office Teeth Whitening
What it is: A dentist applies a high-concentration peroxide gel (usually hydrogen peroxide or carbamide peroxide) to your teeth. Gums are protected with a barrier, and some clinics use a light or laser to speed up the reaction.
Best for: Extrinsic stains, general yellowing, and age-related darkening.
What to expect:
- A single appointment usually lasts 60 to 90 minutes.
- Teeth can lighten by several shades in one visit.
- Temporary sensitivity is common.
Results last: Often 6 months to 2 years, depending on your diet, smoking, and habits.
Limitations:
- It doesn’t change the color of fillings, crowns, veneers, or bonding.
- Gray, tetracycline, and fluorosis stains respond less predictably.
- Whether the light or laser adds real benefit is debated, since the gel does most of the work.
3. Dentist-Supplied Take-Home Whitening Trays
What it is: Your dentist takes impressions of your teeth and makes custom-fitted trays. You fill them with a professional-strength whitening gel and wear them at home, usually for 30 minutes to a few hours a day, or overnight, for one to two weeks.
Best for: People who want gradual, controlled whitening, or who want to do touch-ups later.
Why it works well:
- The custom fit keeps gel on the teeth and off the gums, which reduces irritation.
- The gel is stronger than store-bought strips, but gentler than in-office treatment.
- You can reuse the trays for occasional touch-ups.
Results last: Often 1 to 3 years, with periodic touch-ups.
Limitations: It takes longer than in-office whitening and needs consistency.
4. Microabrasion
What it is: A dentist gently removes a very thin layer of surface enamel using a mild acid and an abrasive compound.
Best for: Shallow white spots, brown spots, or mild fluorosis marks that sit in the outermost enamel.
What to expect:
- It’s usually quick and doesn’t require numbing.
- It can improve the look of certain spots, but it does remove a small amount of enamel, so dentists use it selectively.
- It’s often combined with whitening to even out the color.
Limitations: It doesn’t work for deeper stains, and it isn’t suitable for thin enamel.
5. Dental Bonding
What it is: The dentist applies a tooth-colored composite resin to the stained tooth, shapes it, and hardens it with a special light.
Best for: Stained or discolored areas on one or a few teeth, small chips, or spots that whitening can’t fix.
What to expect:
- It’s usually completed in one visit.
- It often requires little or no removal of tooth structure and may not need numbing.
- It’s one of the more affordable cosmetic options.
Results last: Typically 3 to 10 years, depending on care and location.
Limitations: Bonding material can chip and stain over time, and it isn’t as strong or stain-resistant as porcelain.
6. Veneers
What it is: Thin shells of porcelain or composite resin are bonded to the front of the teeth, covering the stain completely.
Best for: Severe or stubborn intrinsic stains, such as tetracycline staining or deep fluorosis, and for people who also want to change the shape, size, or alignment of their teeth.
What to expect:
- It usually takes two or more visits for porcelain, including a preparation visit and a fitting visit.
- Most porcelain veneers require removing a thin layer of enamel, which makes the procedure irreversible.
- Composite veneers are often cheaper and may need less enamel removal, but they stain and wear more easily.
Results last: Porcelain veneers often last 10 to 20 years with good care. Composite veneers last a shorter time.
Limitations: They are expensive, and they may need replacing eventually. Good oral hygiene is essential to protect the teeth underneath.
7. Crowns
What it is: A cap that covers the entire visible part of a tooth.
Best for: Severely discolored, weakened, or damaged teeth, such as a tooth with heavy decay, a large old filling, or a major structural problem, where discoloration is only part of the issue.
What to expect:
- It usually takes two visits, though some clinics offer same-day crowns.
- Significant tooth structure is removed to make room for the crown.
Results last: Often 10 to 15 years or more.
Limitations: Crowns are generally a last resort for stains alone because they involve the most tooth reduction and cost the most.
8. Internal Bleaching (Walking Bleach)
What it is: A whitening gel is placed inside a root-canal-treated tooth that has darkened, then sealed in temporarily so it can lighten the tooth from the inside.
Best for: A single tooth that turned gray or dark after trauma or a root canal.
What to expect:
- It usually takes one to a few visits, with the gel replaced between appointments.
- It’s often a gentler and cheaper option than a crown if the tooth is otherwise healthy.
Limitations: The tooth can darken again over time, and there’s a small risk of weakening the tooth if the procedure isn’t done carefully. It’s only suitable for teeth that have had root canal treatment.
Professional Options at a Glance
| Treatment | Best For | Visits | Typical Results Last | Relative Cost | Main Trade-off |
|---|---|---|---|---|---|
| Scaling and polishing | Surface stains, tartar | 1 | Until stains return | $ | Doesn’t change natural tooth color |
| In-office whitening | General yellowing, surface stains | 1 | 6 months to 2 years | to $ | Sensitivity, ongoing touch-ups |
| Custom take-home trays | Gradual, controlled whitening | 2 (impressions, fitting) | 1 to 3 years | $$ | Takes longer, needs consistency |
| Microabrasion | Shallow white or brown spots | 1 | Long term | $ to $$ | Removes a little enamel |
| Bonding | Single spots, small defects | 1 | 3 to 10 years | $$ | Can stain or chip |
| Veneers | Severe intrinsic stains | 2+ | 10 to 20 years (porcelain) | $$$$ | Irreversible, expensive |
| Crowns | Severely damaged or discolored teeth | 2 | 10 to 15+ years | $$$$ | Most invasive option |
| Internal bleaching | One dark, root-canal-treated tooth | 1 to 3 | Variable | $ to $$ | Can darken again |
Cost note: prices vary a great deal by country, city, and clinic, so ask for a written estimate before you commit.
How to Choose a Dentist for Cosmetic Treatment
- Ask to see before-and-after photos of similar cases.
- Choose someone who examines first: a good dentist will identify the cause of staining before recommending treatment.
- Ask about alternatives and whether a less invasive option could work.
- Get a clear cost estimate, including follow-up and maintenance.
- Be cautious of anyone who pushes veneers or crowns as the first option for simple surface stains.
Questions to Ask Before Treatment
- What’s causing my discoloration?
- Which option is the least invasive that will still get the result I want?
- How long will results last, and what upkeep is needed?
- What are the risks and side effects?
- Will my existing fillings, crowns, or veneers match after treatment?
Which Method Is Best for Your Situation?
With so many options, the hardest part is knowing where to start. Use this section as a decision guide: find the situation that sounds most like yours, then follow the suggested path from the least invasive option to the most.
Quick Decision Guide
Step 1: Start with the basics (everyone)
Before trying anything else, make sure your daily routine is solid: brush twice a day with a fluoride toothpaste, clean between your teeth, and rinse with water after staining foods and drinks. Many mild stains improve with this alone.
Step 2: Find your situation below.
Situation 1: Mild Coffee or Tea Stains
What it looks like: Light yellow or tan staining, mostly on the front teeth and along the gumline.
Suggested path:
- Switch to a whitening toothpaste with the ADA Seal for 2 to 6 weeks.
- Add a water rinse after every cup, and consider using a straw for iced drinks.
- If it’s still noticeable, try whitening strips for one to two weeks.
- Book a professional cleaning if stains persist.
Most likely to work: Whitening toothpaste plus strips.
Situation 2: Smoker’s Stains
What it looks like: Yellow to dark brown or black staining, often with heavy buildup on the inner surfaces of the teeth.
Suggested path:
- Start with a professional cleaning, since tobacco stains and tartar are usually too stubborn for home care alone.
- Follow with whitening toothpaste and strips or take-home trays.
- Consider in-office whitening for deeper discoloration.
- Plan for quitting tobacco, which is the only way to prevent stains from returning (and it helps your gums and overall health).
Most likely to work: Cleaning first, then whitening. Without a cleaning, whitening products often can’t reach through the buildup.
Situation 3: Yellowing from Aging
What it looks like: Teeth gradually look more yellow or dull all over, even with good hygiene.
Suggested path:
- Use whitening toothpaste for surface stains.
- Try whitening strips or custom take-home trays.
- For faster, stronger results, consider in-office whitening.
Why it works: Age-related yellowing usually responds well to peroxide whitening, because the color comes from a combination of surface stains and darker dentin.
Most likely to work: Strips, trays, or in-office whitening.
Situation 4: Gray or Brown Intrinsic Stains
What it looks like: Gray, bluish, brown, or banded discoloration that has been present for years, often linked to childhood medication, fluorosis, or enamel defects.
Suggested path:
- See a dentist for an evaluation first.
- Professional whitening may help mild cases, but gray and tetracycline stains respond slowly and unpredictably, sometimes needing weeks or months of take-home treatment.
- For more stubborn cases, ask about microabrasion, bonding, or veneers.
Most likely to work: Professional guidance. Store-bought products rarely make much difference here.
Situation 5: A Single Dark Tooth
What it looks like: One tooth that is gray, brown, or noticeably darker than its neighbors, often after an injury or a root canal.
Suggested path:
- See a dentist promptly. A single darkening tooth can indicate nerve damage or infection, and it needs to be assessed before any cosmetic treatment.
- If the tooth has had a root canal, ask about internal bleaching.
- If bleaching doesn’t work, options include bonding, a veneer, or a crown.
Most likely to work: Internal bleaching for root-canal-treated teeth, or a veneer or crown for more severe cases.
Important: Don’t try to whiten this tooth at home. Whitening strips won’t affect the real cause and can delay treatment.
Situation 6: White Spots
What it looks like: Chalky white patches or streaks on the enamel.
Suggested path:
- Ask a dentist to determine the cause. White spots can be early enamel demineralization (a sign of early decay, often after braces), fluorosis, or an enamel defect.
- For demineralization, dentists often recommend fluoride treatments and good hygiene, which may improve the spots over time.
- For fluorosis or lingering spots, ask about microabrasion, resin infiltration, or bonding.
Be careful: Whitening can make white spots look more obvious at first, since the surrounding tooth lightens but the spots may not. Get advice before whitening.
Situation 7: Brown or Black Spots in Grooves or Between Teeth
What it looks like: Small dark spots, especially on back teeth or between teeth.
Suggested path:
- Don’t assume it’s a stain. See a dentist to rule out cavities.
- If it is a stain, a professional cleaning will often remove it.
- If it’s decay, a filling or other restoration is needed, and whitening products won’t help.
Situation 8: Stains Around Fillings, Crowns, or Veneers
What it looks like: Dark edges around dental work, or restorations that no longer match your natural teeth.
Suggested path:
- Ask your dentist to check for leaking margins or decay underneath.
- Whitening won’t change the color of fillings, crowns, or veneers, so if you plan to whiten, ask whether to whiten first and then replace the restoration to match.
At-a-Glance Decision Table
| Your Situation | First Step | If That Isn’t Enough | Avoid |
|---|---|---|---|
| Mild coffee/tea stains | Whitening toothpaste, water rinses | Strips or professional cleaning | Lemon juice, charcoal |
| Smoker’s stains | Professional cleaning | Take-home trays or in-office whitening | Aggressive scrubbing |
| Aging/overall yellowing | Whitening strips or trays | In-office whitening | Over-whitening |
| Gray or banded intrinsic stains | Dentist evaluation | Microabrasion, bonding, veneers | Repeated store-bought whitening |
| One dark tooth | Dentist visit promptly | Internal bleaching, veneer, or crown | DIY whitening |
| White spots | Dentist evaluation, fluoride | Microabrasion, bonding | Whitening before diagnosis |
| Dark spots in grooves | Dentist check for decay | Filling if cavity | Treating it as a stain |
| Stained dental work | Dentist check | Replace restoration to match | Expecting whitening to change it |
A Simple Rule of Thumb
- Surface stains (yellow or brown, mostly on the outside) → start at home.
- Stubborn stains or buildup → professional cleaning.
- Overall dullness or yellowing → peroxide whitening.
- Gray, spotted, or single-tooth discoloration → see a dentist first.
Always move from the least invasive option to the most invasive, and stop when you reach a result you’re happy with.
Mistakes to Avoid When Removing Teeth Stains
Most people who damage their teeth while trying to whiten them are doing it with good intentions. These are the most common mistakes, why they cause problems, and what to do instead.
1. Brushing Too Hard or Using a Hard-Bristled Brush
The mistake: Scrubbing aggressively, hoping to “scrub the stain off.”
Why it’s a problem: Hard brushing wears down enamel and pushes gums back. Thinner enamel lets the yellow dentin underneath show through, so your teeth can end up looking more stained. Gum recession also exposes the root surface, which is naturally darker and more sensitive.
Do this instead:
- Use a soft-bristled brush.
- Hold it like a pen, not a fist, and use light pressure.
- If you use an electric brush, choose one with a pressure sensor.
2. Using Baking Soda or Abrasive Products Every Day
The mistake: Brushing daily with baking soda, charcoal powder, or other gritty “stain removers.”
Why it’s a problem: These products work by scrubbing. Used constantly, they can wear away enamel over time, and enamel doesn’t grow back.
Do this instead:
- Limit baking soda to once or twice a week, if you use it at all.
- Choose a fluoride toothpaste with moderate abrasiveness for daily use.
3. Trying Acidic Home Remedies
The mistake: Rubbing lemon juice, orange peel, or apple cider vinegar on your teeth.
Why it’s a problem: Acids soften and erode enamel. The result is a rough, thinner surface that stains more easily and looks more yellow. The damage is permanent.
Do this instead: Stick with proven options such as whitening toothpaste, strips, or professional treatment.
4. Overusing Whitening Strips and Gels
The mistake: Using strips longer, more often, or in more products than directed, thinking more is better.
Why it’s a problem: Overuse can cause:
- Painful sensitivity
- Gum irritation and chemical burns
- Uneven or “translucent” looking teeth
- Possible enamel damage with extreme overuse
Do this instead:
- Follow the directions on the package exactly.
- Take a break if your teeth or gums feel sore.
- Don’t combine multiple whitening products at once (such as strips, whitening toothpaste, and a peroxide rinse in the same day) without guidance.
5. Using DIY Bleach or Unregulated Products
The mistake: Applying household bleach, concentrated hydrogen peroxide, or imported whitening gels with unknown ingredients.
Why it’s a problem: Strong chemicals can burn gums, damage enamel, and cause serious injury if swallowed. Products sold online without clear labeling may contain unsafe concentrations or banned ingredients.
Do this instead:
- Never use household bleach on your teeth.
- Choose products from reputable brands with clear ingredient lists and instructions.
- Look for the ADA Seal (or your country’s equivalent) where available.
- Ask your dentist about professional-strength options.
6. Whitening Before Checking for Cavities or Gum Problems
The mistake: Starting to whiten without a dental checkup.
Why it’s a problem:
- Whitening gel can seep into cavities and cracks, causing sharp pain.
- Dark spots may be decay, not stains, and whitening won’t fix them.
- Gum disease can make gums more painful and irritated with whitening products.
Do this instead: Get an exam and cleaning first, treat any problems, and then whiten.
7. Ignoring Tartar
The mistake: Trying to whiten teeth that are covered with tartar.
Why it’s a problem: Tartar is hardened plaque and can’t be brushed off. It blocks whitening gel from reaching the tooth and keeps collecting stains, so results end up patchy.
Do this instead: Have a professional cleaning before using any whitening product.
8. Brushing Right After Acidic Foods and Drinks
The mistake: Brushing immediately after coffee, wine, soda, citrus, or sports drinks.
Why it’s a problem: Acid temporarily softens the enamel surface, so brushing at that moment can scrub away some of it.
Do this instead:
- Rinse your mouth with water right away.
- Wait about 30 minutes before brushing.
9. Expecting Whitening to Change Dental Work
The mistake: Whitening teeth that have crowns, veneers, bonding, or fillings and expecting everything to match.
Why it’s a problem: Whitening only changes natural tooth color. Dental work stays the same shade, so your natural teeth may end up lighter than your restorations.
Do this instead: Talk to your dentist before whitening. They may suggest whitening first, then replacing or matching restorations afterward.
10. Skipping the Routine After Whitening
The mistake: Whitening and then going straight back to heavy coffee, wine, or smoking.
Why it’s a problem: Freshly whitened teeth can be more prone to staining, especially in the first 48 hours. Old habits can undo your results quickly.
Do this instead:
- Avoid dark-colored foods and drinks for the first couple of days after whitening.
- Keep up with daily brushing, flossing, and water rinses.
- Schedule touch-ups only when needed.
11. Ignoring Sensitivity or Pain
The mistake: Pushing through sharp or lingering pain from whitening.
Why it’s a problem: Mild, temporary sensitivity is common, but sharp or lasting pain can signal enamel damage, exposed roots, cavities, or gum problems.
Do this instead:
- Stop whitening and use a toothpaste for sensitive teeth.
- Call your dentist if the pain lasts more than a few days or is severe.
12. Believing Social Media Hacks
The mistake: Trying viral “teeth whitening hacks” without checking whether they’re supported by evidence.
Why it’s a problem: Trends such as charcoal, lemon juice, and homemade pastes often look dramatic but can cause real damage.
Do this instead: Check claims with your dentist or a trusted source such as the ADA or NHS.
Mistakes Checklist
| Mistake | Risk | Safer Alternative |
|---|---|---|
| Hard brushing | Enamel wear, gum recession | Soft brush, light pressure |
| Daily baking soda or charcoal | Enamel abrasion | Occasional use or fluoride whitening toothpaste |
| Lemon, vinegar, citrus rubs | Enamel erosion | Proven whitening products |
| Overusing strips | Sensitivity, gum burns | Follow package directions |
| DIY bleach or unlabeled gels | Chemical injury | Reputable or professional products |
| Whitening with cavities | Pain, delayed treatment | Dental exam first |
| Whitening over tartar | Patchy results | Professional cleaning first |
| Brushing right after acid | Enamel loss | Rinse, wait 30 minutes |
| Ignoring dental work | Mismatched shades | Plan with your dentist |
| Ignoring pain | Possible damage | Stop and see a dentist |
The Golden Rule
If a method makes your teeth hurt, feel rough, or look more translucent, stop. Healthy enamel is the foundation of a bright smile, and it’s far easier to protect than to repair.
Who Should Not Whiten Their Teeth
Teeth whitening is safe for most healthy adults when done correctly, but it isn’t right for everyone. Some people should wait, get dental treatment first, or choose a different approach. If you fall into any of the groups below, talk to your dentist before using any whitening product.
1. Children and Young Teens
Why to avoid it: Younger teeth have larger nerve chambers (pulps), so peroxide can reach sensitive tissue more easily. Their gums are also more prone to irritation, and teeth are still developing. In the EU, for example, peroxide whitening products are restricted for people under 16.
What to do instead:
- Focus on brushing, flossing, and regular dental visits.
- If a child or teen is unhappy with their tooth color or has visible stains, have a dentist check the cause. It may be plaque, braces-related staining, or an enamel condition that needs a different approach.
2. Pregnant and Breastfeeding Women
The situation: There’s no strong evidence that whitening harms a pregnancy or a baby, but there also isn’t enough safety research. Because of this, dentists generally recommend postponing elective whitening until after pregnancy and breastfeeding.
What to do instead:
- Keep up with brushing, flossing, and routine cleanings, which are safe and helpful.
- Pregnancy hormones can make gums more sensitive and prone to inflammation, so gentle care matters.
- Ask your dentist or doctor if you have questions about a specific product.
3. People with Untreated Cavities
Why to avoid it: Whitening gel can seep into decayed areas and reach the inner tooth, causing sharp pain. Also, brown or black spots may be decay, which whitening won’t fix.
What to do instead: Get an exam, treat any cavities, and then whiten once your dentist says it’s safe.
4. People with Gum Disease or Inflamed Gums
Why to avoid it: Peroxide can irritate already inflamed or bleeding gums, causing pain or chemical burns. Gum disease also needs treatment on its own, since whitening won’t address it.
What to do instead:
- Treat gum disease first, with professional cleaning and good home care.
- Once your gums are healthy, ask whether whitening is appropriate.
5. People with Very Sensitive Teeth
Why to be careful: Whitening commonly causes temporary sensitivity, and people who already have sensitive teeth may find it painful.
What to do instead:
- Ask your dentist about desensitizing treatments or lower-concentration gels.
- Use a sensitivity toothpaste for a few weeks before and during whitening, as your dentist advises.
- Choose gentler options such as shorter wear times or less frequent use.
6. People with Worn Enamel, Cracks, or Exposed Roots
Why to avoid it:
- Thin or worn enamel offers less protection, and whitening can worsen sensitivity.
- Cracked teeth let gel reach the inner tooth.
- Exposed root surfaces (from gum recession) are sensitive and don’t whiten well.
What to do instead: Ask a dentist about protecting or repairing the affected teeth first, with options such as fluoride treatments, bonding, or sealants.
7. People with Allergies or Sensitivity to Peroxide
Why to avoid it: Some people have allergic reactions or irritation from peroxide gels or other ingredients in whitening products. Signs include swelling, rash, or severe burning in the mouth.
What to do instead: Stop using the product and ask your dentist or doctor about alternatives.
8. People with Lots of Dental Work in the Front Teeth
Why to be careful: Crowns, veneers, bonding, and fillings don’t change color with whitening. If you whiten your natural teeth, they may no longer match the dental work.
What to do instead:
- Talk to your dentist before whitening.
- Consider whitening first, then replacing or matching restorations afterward.
9. People with Intrinsic Stains That Don’t Respond Well
Why to be careful: Gray, brown, or banded stains (like tetracycline staining) and some fluorosis marks can be stubborn. Whitening may produce uneven results or take a long time.
What to do instead: Ask about professional options such as microabrasion, bonding, or veneers.
10. People with Dry Mouth or Teeth Grinding
Why to be careful:
- Dry mouth (from medications or medical conditions) can increase sensitivity and cavity risk.
- Teeth grinding (bruxism) can wear enamel and leave teeth sensitive.
What to do instead: Discuss it with your dentist. A night guard, saliva-support products, or a modified whitening plan may help.
11. People with Braces, Aligners, or Orthodontic Work
Why to wait: Whitening while wearing braces can leave uneven patches, since the areas under the brackets stay unwhitened. Whitening gel can also irritate gums that are already tender.
What to do instead:
- Wait until your braces come off, then whiten for an even result.
- Clear aligner users should check with their orthodontist, since some aligner systems work with whitening gels.
12. People with Unrealistic Expectations
Why to pause: Whitening can lighten teeth by a few shades, but it won’t create a “Hollywood white” smile for everyone. Your natural tooth color sets the limit.
What to do instead: Ask your dentist what’s realistic for your teeth, and look at before-and-after photos of similar cases.
Quick Reference Table
| Group | Main Concern | What to Do |
|---|---|---|
| Children and young teens | Immature teeth, sensitive pulp | Dental check, focus on hygiene |
| Pregnant or breastfeeding | Limited safety research | Postpone elective whitening |
| Untreated cavities | Pain, seepage into tooth | Treat decay first |
| Gum disease | Irritation, burns | Treat gums first |
| Very sensitive teeth | Pain | Desensitizing treatments, gentler options |
| Worn enamel, cracks, exposed roots | Sensitivity, uneven results | Repair or protect before whitening |
| Peroxide allergy | Allergic reaction | Stop, ask a professional |
| Lots of front dental work | Color mismatch | Plan whitening and restorations together |
| Stubborn intrinsic stains | Poor or uneven results | Professional alternatives |
| Dry mouth or grinding | Sensitivity, wear | Dentist-guided plan |
| Braces | Patchy color | Wait until braces are off |
Not Sure Where You Fit?
If you’re unsure whether whitening is safe for you, a quick dental check-up can answer the question. It’s also a good way to rule out cavities, gum problems, and other conditions that can make whitening painful or ineffective.
Note: This information is general and doesn’t replace advice from a dentist or doctor.
Side Effects and Safety
Most people tolerate teeth whitening well, and side effects are usually mild and short-lived. Knowing what’s normal, what’s not, and how to reduce the risk helps you whiten safely and spot a problem early.
Common Side Effects
1. Tooth Sensitivity
What it is: A quick, sharp twinge when teeth contact cold air, cold drinks, or sometimes hot or sweet foods. It’s the most common side effect of peroxide whitening.
Why it happens: Peroxide passes through enamel and temporarily irritates the nerve inside the tooth. It also makes the enamel slightly more porous for a short time.
How long it lasts: Usually a few hours to a few days after treatment. It should fade completely.
How to manage it:
- Use a toothpaste for sensitive teeth (with potassium nitrate or stannous fluoride) for a couple of weeks before and during whitening.
- Shorten wear time or whiten every other day.
- Avoid very hot, cold, or acidic foods and drinks for a day or two.
- Ask your dentist about desensitizing gels or fluoride treatments.
- Take a break if sensitivity builds up.
2. Gum Irritation
What it is: Redness, soreness, or white patches on the gums.
Why it happens: Whitening gel touches the gum tissue, especially with poorly fitting trays or strips that overlap the gumline.
How long it lasts: Mild irritation usually settles within a day or two. White patches are a mild chemical irritation that typically fades within hours.
How to manage it:
- Wipe away excess gel with a clean cloth or cotton swab.
- Make sure strips and trays fit properly and don’t overfill trays.
- Rinse your mouth with water after treatment.
- Stop using the product if soreness persists.
3. Uneven or Patchy Results
What it is: Some areas of the tooth look lighter than others, or certain teeth lighten more than their neighbors.
Why it happens:
- Stains and tartar block the gel in places.
- Strips or trays don’t make full contact with every surface.
- Some parts of a tooth have thicker enamel or different natural color.
- Spots, bands, or dental work respond differently.
How to manage it: Get a professional cleaning before whitening, make sure the product covers all surfaces, and ask your dentist about gradual or targeted treatment.
4. Throat or Stomach Irritation
What it is: A mild sore throat, upset stomach, or irritated mouth lining.
Why it happens: Swallowing some whitening gel or excess saliva mixed with gel.
How to manage it: Use only the amount recommended, spit out excess gel, and rinse your mouth with water. Don’t swallow gel on purpose, and keep it away from children.
Less Common but Serious Concerns
Enamel Changes
The concern: Some lab studies show that very frequent or high-concentration whitening can slightly roughen or soften enamel. In real-world use, properly applied whitening within recommended limits is considered safe for enamel.
How to lower the risk:
- Don’t exceed the recommended frequency or duration.
- Avoid extremely high-strength products without professional supervision.
- Use fluoride toothpaste to help re-harden the enamel surface.
- Avoid acidic and abrasive DIY remedies alongside whitening.
Chemical Burns
The concern: High-strength gels can burn gum and lip tissue if they’re not properly isolated.
How to lower the risk: Have strong whitening done by a dental professional who protects the gums with a barrier, and don’t use DIY concentrations stronger than the product label allows.
Worsening Existing Problems
The concern: Whitening can aggravate untreated cavities, cracked teeth, exposed roots, or gum disease.
How to lower the risk: Get a dental check-up and treat any problems before you start.
Allergic Reactions
The concern: Rarely, someone may react to peroxide or other ingredients with swelling, rash, or severe burning.
What to do: Stop immediately, rinse your mouth, and get medical advice, especially if you have swelling of the lips, face, or throat, or difficulty breathing. These need urgent care.
How to Whiten More Safely
- Start with a dental check-up and cleaning.
- Choose reputable products with clear ingredient lists, concentration information, and directions. Look for the ADA Seal or your country’s equivalent.
- Follow the instructions exactly. More gel or longer wear doesn’t mean better results.
- Protect your gums. Keep gel off the gumline and wipe away excess.
- Don’t whiten constantly. Space out treatments and allow teeth time to recover.
- Pay attention to your body. Mild, brief sensitivity is normal, but sharp or lasting pain is not.
- Keep up good oral care. Brush with fluoride toothpaste and clean between your teeth.
- Don’t use whitening products on children or if you’re advised against it (see the previous section).
Warning Signs: When to Stop and See a Dentist
Stop whitening and book an appointment if you notice:
- Sharp or lingering tooth pain lasting more than a few days
- Severe or worsening gum soreness, blistering, or sores
- Swelling of the face, lips, or tongue
- Teeth that look translucent, rough, or chalky
- Bleeding gums that don’t improve
- Sudden new sensitivity in one tooth only
Seek urgent medical help if you have trouble breathing or swallowing, or severe swelling after using a whitening product.
Side Effects at a Glance
| Side Effect | How Common | Typical Duration | What Helps |
|---|---|---|---|
| Tooth sensitivity | Common | Hours to a few days | Sensitivity toothpaste, shorter wear times |
| Gum irritation | Common | 1 to 2 days | Wipe off excess gel, better fit |
| Patchy results | Occasional | Until corrected | Professional cleaning, even coverage |
| Throat or stomach upset | Uncommon | Short | Spit out excess, rinse well |
| Enamel roughening (overuse) | Uncommon | Can be lasting | Follow limits, use fluoride |
| Chemical burn | Rare | Days | Professional application, gum protection |
| Allergic reaction | Rare | Variable | Stop use, get medical advice |
Choosing a Safe Product: Quick Checklist
- ✅ Clear peroxide concentration listed
- ✅ Instructions for wear time and frequency
- ✅ Seal of approval from a recognized dental association (where available)
- ✅ Reputable manufacturer with contact details
- ✅ Includes guidance for sensitivity and gum protection
- ❌ Avoid products with unlisted ingredients, extreme claims (“instant,” “permanent”), or no safety information
Note: This section is for general education and doesn’t replace advice from a dentist or doctor.
How to Prevent Teeth Stains from Returning
Removing stains is only half the job. Without a few simple habits, the same stains tend to creep back within months. The good news is that prevention doesn’t require giving up everything you enjoy. It’s mostly about small, consistent changes.
1. Build a Stain-Fighting Daily Routine
Brush twice a day
- Use a soft-bristled brush and a fluoride toothpaste for two minutes each time.
- Brush before bed in particular, since plaque and pigments have all night to settle if you skip it.
- Consider a whitening toothpaste a few times a week for maintenance, but avoid highly abrasive formulas for daily use.
Clean between your teeth daily
- Floss, use interdental brushes, or try a water flosser.
- Stains and plaque collect in these spaces first, and they’re easy to miss.
Rinse with water after staining foods and drinks
- A quick swish after coffee, tea, wine, soda, or dark sauces washes away pigments before they attach.
- If you can’t brush right away, water is the next best thing.
Wait before brushing after acidic items
- Rinse first, then brush after about 30 minutes so you don’t scrub softened enamel.
Replace your toothbrush regularly
- Swap your brush or electric brush head every three months, or sooner if the bristles are frayed.
2. Adjust How You Eat and Drink (Without Giving Everything Up)
You don’t have to quit coffee or red wine. Small changes reduce how much pigment reaches your teeth.
Use a straw for iced coffee, tea, juice, and soda so the liquid bypasses your front teeth.
Don’t sip all day. Sipping coffee or tea for hours exposes teeth to pigment and acid continuously. It’s better to finish a drink in one sitting than to nurse it.
Add milk to coffee and tea. The proteins in milk can bind to some of the tannins, which may reduce staining slightly.
Pair staining foods with protective ones. Eating cheese, yogurt, crunchy vegetables, or apples with or after a meal helps stimulate saliva and clear residue.
Be mindful of the usual culprits:
- Coffee, black tea, and red wine
- Cola and dark sodas
- Berries and dark fruit juices
- Tomato sauce, soy sauce, balsamic vinegar, and curry
Don’t forget “hidden” stainers: sports drinks, energy drinks, and some herbal teas can be both acidic and pigmented.
3. Quit or Cut Back on Tobacco
Tobacco is one of the strongest causes of stubborn, recurring stains.
- Nicotine and tar attach quickly to enamel and are hard to remove completely.
- Stains tend to return fast after cleanings if tobacco use continues.
- Quitting also protects your gums, lowers your risk of oral cancer, and improves your overall health.
If you’re not ready to quit: use water rinses after smoking, brush more consistently, and book cleanings more often, but understand that results won’t last as long.
If you want to quit: talk to your doctor or dentist about support options, such as counseling and nicotine replacement. Many people find it takes a few attempts, and that’s normal.
4. Keep Up with Regular Dental Visits
- Professional cleanings every six months (or as often as your dentist recommends) remove tartar and polish away surface stains that home care can’t reach.
- Check-ups catch problems early, such as cavities, gum disease, or worn enamel, that can lead to discoloration.
- If you’re prone to stains (heavy coffee drinker, smoker, or someone who builds tartar quickly), ask whether you’d benefit from cleanings every three to four months.
- Ask your dentist or hygienist to show you areas you tend to miss when brushing.
5. Plan Touch-Ups Wisely
Whitening isn’t permanent, and a bit of maintenance helps results last. But more isn’t better.
General guidelines:
- Whitening toothpaste: a few times a week for gentle maintenance.
- Strips or trays: use occasional touch-ups, for example once or twice a year, or when you first notice color returning, following the product’s directions.
- In-office whitening: many people repeat it every one to two years, depending on habits and results.
- Space treatments out to protect enamel and reduce sensitivity.
Tip: If you have custom trays from your dentist, keep them clean and stored safely. They make future touch-ups quick and inexpensive.
6. Protect Your Enamel
Healthy, smooth enamel resists stains better than worn or rough enamel.
- Use a fluoride toothpaste every day.
- Avoid acidic and abrasive DIY remedies.
- Limit frequent snacking on sugary or acidic foods.
- If you grind your teeth at night, ask about a night guard.
- Treat dry mouth, since saliva is your mouth’s natural defense against staining and decay.
7. Stay Hydrated
Drinking plenty of water helps keep your mouth moist and rinses away food particles. Dry mouth makes it easier for plaque and stains to build up, so staying hydrated is a simple but effective habit.
Daily and Weekly Stain-Prevention Checklist
Every day
- ☐ Brush twice with fluoride toothpaste
- ☐ Clean between teeth once
- ☐ Rinse with water after coffee, tea, wine, or soda
- ☐ Use a straw for dark drinks where possible
- ☐ Drink plenty of water
Every week
- ☐ Use whitening toothpaste a few times for maintenance (optional)
- ☐ Check for areas you’re missing when brushing
- ☐ Clean your toothbrush or replace the head as needed
Every few months
- ☐ Replace your toothbrush or brush head (every three months)
- ☐ Review your habits: are you sipping coffee all day?
Twice a year (or as advised)
- ☐ Professional cleaning and check-up
- ☐ Ask whether touch-up whitening is appropriate
Quick Reference: Habit and Benefit
| Habit | How It Helps |
|---|---|
| Brushing twice with fluoride toothpaste | Removes plaque and fresh stains, protects enamel |
| Daily flossing or interdental cleaning | Stops stains and tartar forming between teeth |
| Water rinse after dark drinks | Washes away pigments before they stick |
| Drinking through a straw | Reduces contact with front teeth |
| Avoiding all-day sipping | Limits pigment and acid exposure |
| Quitting tobacco | Removes the biggest cause of heavy staining |
| Professional cleanings | Remove tartar and surface stains |
| Occasional touch-up whitening | Maintains results |
| Staying hydrated | Supports saliva and natural cleansing |
The Bottom Line
You don’t need a perfect routine to keep stains away. Focus on three things: clean thoroughly, rinse after staining foods, and see your dentist regularly. If you do those consistently, your results will last far longer.
How Long Do Results Last?
There’s no single answer, because how long your results last depends on the method you chose, the type of stain, and what you do afterward. A careful routine can keep teeth bright for years, while heavy coffee or tobacco use can undo results in a few months. The timelines below are general estimates, and individual results vary.
Typical Duration by Method
| Method | Typical Results Last | Notes |
|---|---|---|
| Whitening toothpaste | Only while you keep using it | Removes surface stains but doesn’t change natural tooth color |
| Whitening mouthwash | Only while you keep using it | Very subtle, best for maintenance |
| Baking soda or peroxide rinses | Short term | Results fade quickly without ongoing use |
| Whitening strips | About 3 to 6 months, sometimes up to a year | Depends on diet and habits |
| LED whitening kits | About 3 to 6 months | Similar to strips, since the gel does the work |
| Professional cleaning | Until plaque and stains build up again, often 3 to 6 months | Removes surface stains and tartar |
| In-office whitening | About 6 months to 2 years | Longer with good maintenance |
| Custom take-home trays | About 1 to 3 years with touch-ups | Trays can be reused |
| Microabrasion | Long term | Removes a thin layer of enamel, so the effect is permanent for treated spots |
| Dental bonding | About 3 to 10 years | Can chip or stain over time |
| Porcelain veneers | About 10 to 20 years | Resist stains well, but may need replacement eventually |
| Composite veneers | About 5 to 7 years | Stain and wear more than porcelain |
| Crowns | About 10 to 15 years or more | Depends on material and care |
| Internal bleaching | Variable, sometimes several years | The tooth can darken again |
Why Whitening Isn’t Permanent
Whitening doesn’t “fix” your teeth forever. It lightens the color for now, and a few things gradually bring stains back:
- New stains build up every time pigments from food, drinks, or tobacco attach to the enamel.
- The pellicle reforms. The thin film on your teeth is replaced within hours, and it keeps catching color.
- Aging continues. Enamel keeps thinning and dentin keeps darkening naturally.
- Whitened teeth can be slightly more porous for a short time after treatment, so they may pick up stains more easily at first.
What Shortens Your Results
- Heavy coffee, tea, or red wine habits
- Smoking or chewing tobacco
- Skipping brushing, flossing, or professional cleanings
- Sipping staining drinks all day
- Not rinsing after dark foods and drinks
- Dry mouth, which reduces natural cleansing
- Using whitening products incorrectly or stopping too early
What Helps Results Last Longer
- Avoid dark-colored foods and drinks for the first 48 hours after whitening, when teeth are most vulnerable.
- Rinse with water after anything that stains.
- Use a straw for iced coffee, tea, and soda.
- Brush gently twice a day with fluoride toothpaste.
- Clean between teeth daily to prevent plaque and tartar.
- Quit tobacco, or cut back as much as possible.
- Keep up with professional cleanings, usually every six months.
- Plan occasional touch-ups instead of waiting until teeth look very stained.
Realistic Expectations by Lifestyle
These are general examples, not guarantees.
| Your Habits | What to Expect |
|---|---|
| Rarely drink coffee, tea, or wine, no tobacco, good hygiene | Results may last toward the longer end of the range |
| Drink coffee or tea daily, use a straw and rinse | Moderate longevity, with a touch-up every 6 to 12 months |
| Heavy coffee, tea, or wine drinker, no precautions | Results may fade in a few months |
| Smoker | Stains return quickly, sometimes within weeks to months |
Signs It’s Time for a Touch-Up
- Your teeth look duller or more yellow than right after treatment
- Stains return along the gumline or between teeth
- Your smile looks uneven compared to your whitened shade
- It’s been about as long as the typical results period for your method
Before you touch up: ask your dentist whether a cleaning would be enough. Sometimes removing fresh surface stains restores most of the brightness without any whitening gel.
How Often Is It Safe to Whiten?
There’s no one-size-fits-all rule, and over-whitening can cause sensitivity and may affect enamel. As a general guideline:
- Use products exactly as directed, and don’t repeat treatments more often than the label says.
- Leave gaps between whitening courses, often several months.
- Ask your dentist to recommend a schedule based on your teeth and gum health.
Quick Takeaways
- Whitening results are temporary, but good habits can extend them significantly.
- Professional and custom-tray treatments generally last longer than store-bought products.
- Veneers, crowns, and bonding last longer than whitening but come with trade-offs, including cost and enamel removal in some cases.
- The biggest factors are your diet, tobacco use, and hygiene routine.
Cost Overview
Costs vary widely depending on your country, city, the clinic, and your dentist’s experience. The figures below are rough, US-based ballpark ranges in US dollars, meant to help readers compare options against each other. Prices elsewhere can be much lower or higher, so always ask for a written estimate.
Home Products
| Product | Approximate Cost | How Long It Lasts |
|---|---|---|
| Whitening toothpaste | $5 to $15 per tube | 1 to 2 months |
| Whitening mouthwash | $8 to $15 per bottle | 3 to 6 weeks |
| Baking soda | Under $5 | Many uses |
| 3% hydrogen peroxide | Under $5 | Many uses |
| Electric toothbrush | $30 to $200+ (replacement heads $15 to $40) | Years (heads every 3 months) |
| Whitening strips | $25 to $70 per course | One course (1 to 2 weeks) |
| LED whitening kit | $30 to $150 | One or more courses |
| Interdental brushes or floss | $3 to $15 | 1 to 3 months |
What you’re paying for: Most of the cost in strips and kits is the peroxide gel. Fancy packaging, LED lights, and brand names often add price without adding results.
Professional Treatments
| Treatment | Approximate Cost | Notes |
|---|---|---|
| Dental exam and cleaning | $75 to $250 | Often partly covered by insurance |
| In-office whitening | $300 to $1,000 | One session; price varies by system |
| Custom take-home trays | $150 to $500 | Includes trays and gel; refills extra |
| Microabrasion | $100 to $500 | Depends on number of teeth |
| Dental bonding | $100 to $400 per tooth | Cheaper than veneers, shorter lifespan |
| Composite veneers | $250 to $1,500 per tooth | Lower upfront cost, more upkeep |
| Porcelain veneers | $900 to $2,500+ per tooth | Longest lasting, highest cost |
| Crowns | $800 to $3,000 per tooth | Depends on material |
| Internal bleaching | $100 to $400 per tooth | Only for root-canal-treated teeth |
What Affects the Price
- Location: Big cities and high-cost areas usually charge more.
- Dentist experience: Cosmetic specialists often charge more than general dentists.
- Number of teeth treated: Veneers, bonding, and crowns are priced per tooth, which adds up fast.
- Materials used: Porcelain costs more than composite resin.
- Complexity: Severe intrinsic stains or damaged teeth need more work.
- Extras: X-rays, exams, anesthesia, and follow-up visits may be billed separately.
Cost Over Time: The Real Comparison
Looking only at the upfront price can be misleading. Here is how the numbers can compare over five years, using simplified examples:
| Approach | Upfront Cost | Maintenance | Rough 5-Year Picture |
|---|---|---|---|
| Whitening toothpaste only | Very low | Ongoing purchase | Low total, modest results |
| Strips, repeated twice a year | Low to medium | Repeat purchases | Moderate total, decent results |
| Custom trays plus occasional gel | Medium | Gel refills | Moderate total, strong results |
| In-office whitening every 1 to 2 years | Higher | Repeat sessions | Higher total, fast results |
| Porcelain veneers (several teeth) | Very high | Minimal, replacement years later | Highest upfront, lowest ongoing |
For people who want long-term whitening on a budget, custom trays are often the best balance of cost and results, since the trays can be reused with refill gel.
Is Insurance Likely to Cover It?
- Cleanings and exams: usually covered, fully or in part.
- Whitening, veneers, and most bonding done for appearance: generally treated as cosmetic, so usually not covered.
- Treatment for a medical or restorative reason (for example, a tooth damaged by trauma or decay) may be partly covered.
Check your plan and ask the clinic to submit a pre-estimate if coverage is possible.
Ways to Save Money
- Start with a professional cleaning. It’s often the cheapest way to see a big improvement, because many “stains” are really tartar and surface buildup.
- Try the least invasive option first. Move up to more expensive treatments only if needed.
- Ask about custom trays instead of repeated in-office sessions.
- Compare quotes from two or three clinics, and ask what’s included.
- Look for dental schools or community clinics, which often offer reduced-cost treatment performed by supervised students.
- Ask about payment plans or package pricing for multi-tooth work.
- Skip trendy extras. Pricey kits, LED lights, and “charcoal” products rarely beat basic, well-chosen options.
- Protect your investment with good daily habits so you need fewer touch-ups.
Watch for These Red Flags
- Very low prices from unknown sellers for “professional-strength” gels
- Pressure to buy expensive treatments before a proper exam
- No clear written estimate
- Promises of “permanent” or “instant” whitening
Note: All prices are rough estimates for general comparison only and may not match what you’ll pay in your area. Ask your dentist for an exact quote.
When to See a Dentist
Many stains can be handled at home, but some discoloration is a sign of something that needs professional attention. Knowing the difference can save you time and money, and it can catch problems early, before they become painful or expensive.
See a Dentist Soon If You Notice
1. A Sudden Change in Color
If a tooth or several teeth change color over days or weeks without an obvious reason (such as a new food or drink habit), get it checked.
Possible causes: early decay, a cracked tooth, nerve problems, or internal changes in the tooth.
2. One Tooth Darker Than the Rest
A single gray, brown, pink, or dark tooth often points to trauma, nerve damage, or infection, especially if you’ve had a knock to the mouth or a past root canal. The color change may appear months or even years after the injury.
Why it matters: The tooth can have an internal problem that whitening won’t fix and that may get worse if left untreated.
3. Brown or Black Spots That May Be Decay
Dark spots in the grooves of back teeth, between teeth, or around fillings are not always stains. They can be cavities in the early or advanced stage.
Signs it may be decay, not a stain:
- The spot feels rough, soft, or sticky when you touch it gently with your tongue
- It’s sensitive to sweets, hot, or cold
- It’s getting larger or darker over time
- It doesn’t change after thorough brushing or cleaning
4. Discoloration with Pain, Swelling, or a Bad Taste
Pain, swelling in the gums or face, a pimple-like bump on the gum, a bad taste, or persistent bad breath along with discoloration can indicate an infection or abscess. This needs prompt treatment.
5. Stains That Don’t Respond to Home Care
If you’ve followed a consistent routine for 3 to 4 weeks (proper brushing, whitening toothpaste, and possibly strips) and see little change, the stain is likely tartar, intrinsic, or something that needs professional tools.
6. Hard Yellow or Brown Deposits at the Gumline
Crusty buildup that you can’t brush off is probably tartar. Only a dentist or hygienist can remove it, and leaving it can lead to gum disease.
7. Chalky White Spots or Streaks
These may indicate early enamel demineralization, fluorosis, or an enamel defect. A dentist can tell which, and early treatment such as fluoride can help prevent cavities.
8. Gray Teeth, Banding, or Long-Standing Discoloration
Gray, bluish, or banded teeth, especially if they’ve been that color for years, often involve intrinsic stains (for example, from childhood medication or enamel conditions). Store-bought products rarely help, and a dentist can explain what options exist.
9. Sensitivity or Enamel Wear Along with Staining
If your teeth look yellow, translucent, or glassy, and are also sensitive, the cause may be enamel erosion. Whitening may make this worse, so get advice first.
10. Gum Problems
Bleeding, swollen, red, or receding gums along with staining suggest gum disease or heavy plaque buildup. Treating the gums comes before any cosmetic work.
11. Dark Edges Around Fillings or Crowns
A dark line around dental work can mean leakage or decay underneath, which needs repair, not whitening.
12. Whitening Side Effects That Won’t Settle
Sharp or lingering pain, ongoing gum soreness, blisters, or sensitivity lasting more than a few days after whitening should be checked.
Urgent Situations
Seek same-day dental or medical care if you have:
- Facial swelling, especially if it spreads toward the eye or neck
- Fever with tooth or gum pain
- Difficulty swallowing or breathing
- Severe, throbbing tooth pain
- A pus-filled bump on the gum
- Swelling of the lips, tongue, or face after using a whitening product (this could be an allergic reaction, so get emergency medical help if breathing is affected)
Routine Reasons to Book a Visit
You don’t need a problem to see a dentist. It’s a good idea to book an appointment if:
- It’s been more than six months since your last cleaning and check-up
- You’re planning to whiten and want to make sure your teeth and gums are healthy first
- You smoke, drink a lot of coffee or tea, or build up tartar quickly
- You have dental work on your front teeth and want to whiten
- You’re unsure what kind of stain you have
What to Expect at the Appointment
- Questions about your history: when the discoloration started, any injuries, medications, habits, and past dental work.
- A visual exam: the dentist checks your teeth, gums, and existing restorations.
- X-rays if needed: to look for decay, infection, or problems inside or between teeth.
- A diagnosis: whether it’s a surface stain, tartar, decay, or an intrinsic change.
- Treatment options: usually starting with the least invasive choice, along with costs and timelines.
Tip: Bring a list of medications and any dental history you know, and ask for before-and-after photos of similar cases if cosmetic work is recommended.
Questions Worth Asking Your Dentist
- What is causing my discoloration?
- Is this a surface stain, or is it inside the tooth?
- Is it safe for me to whiten, given my teeth and gums?
- What’s the least invasive option that will give me a good result?
- How long will the results last, and what will maintenance cost?
- Will my existing fillings or crowns match after treatment?
Quick Reference: Symptom and Action
| What You Notice | Possible Meaning | What to Do |
|---|---|---|
| Light yellow or brown film that improves with brushing | Surface stains or plaque | Home care, routine cleaning |
| Hard crusty buildup at the gumline | Tartar | Professional cleaning |
| One dark or gray tooth | Trauma, nerve damage, or infection | See a dentist soon |
| Dark spots in grooves or between teeth | Possible cavity | See a dentist |
| Chalky white spots | Demineralization or fluorosis | Dental evaluation |
| Gray or banded teeth | Intrinsic stain | Dental consultation |
| Dark edges around fillings | Leakage or decay | See a dentist |
| Discoloration with pain or swelling | Possible infection | Urgent dental care |
| Sensitivity or pain after whitening | Irritation or underlying problem | Stop, call your dentist if it persists |
| No improvement after 3 to 4 weeks of home care | Stubborn or intrinsic stain | Book an appointment |
The Bottom Line
When in doubt, get it checked. A quick exam can confirm whether you’re dealing with a harmless surface stain or a problem that needs treatment, and it ensures that whatever you do next is both safe and effective.
Note: This section is for general information only and doesn’t replace professional dental or medical advice.
Frequently Asked Questions
Can teeth stains be removed permanently?
Not usually. Surface stains can be removed, and professional treatments like veneers or bonding can cover stains for many years, but staining can return if the causes continue. Whitening results typically last from several months to a couple of years, depending on your diet, tobacco use, and hygiene. Regular cleanings and good daily habits help results last longer.
How can I remove stains from teeth at home fast?
For surface stains, the fastest safe options are whitening strips, which can show visible results in a few days to two weeks, and a thorough routine of brushing twice daily with whitening toothpaste and cleaning between your teeth. A professional cleaning is faster still if tartar is involved. Avoid “instant” hacks like lemon juice or charcoal, which can damage enamel.
Does baking soda really remove stains from teeth?
It can help a little. Baking soda is a mild abrasive that may lift light surface stains, but the effect is modest, and it won’t change the natural color of your teeth. Use it no more than once or twice a week, and don’t use it in place of fluoride toothpaste. Too much scrubbing can wear enamel.
Can yellow teeth become white again?
Often, yes, to a degree. Yellowing from surface stains can improve with cleaning and whitening. Yellowing that comes from naturally yellow dentin or thinning enamel usually responds well to peroxide whitening, but your natural tooth color sets the limit on how white your teeth can get. A dentist can tell you what’s realistic for your teeth.
Why do my teeth stain so easily?
Common reasons include:
- Frequent coffee, tea, red wine, or dark sodas
- Tobacco use
- Plaque or tartar buildup
- Thin or rough enamel, which lets pigments settle more easily
- Dry mouth, which reduces saliva’s natural cleaning effect
- Certain medications or mouthwashes
- Naturally porous or darker teeth
If your teeth seem to stain no matter what you do, a dental check-up can help identify the cause.
Do whitening toothpastes damage enamel?
Most whitening toothpastes are safe for daily use, especially those with the ADA Seal of Acceptance. They work by gently polishing away surface stains. However, highly abrasive formulas used with hard brushing can wear enamel over time. Choose a product with fluoride and moderate abrasiveness, brush gently, and switch to a sensitive-teeth formula if you notice discomfort.
Can brown stains be removed?
It depends on the cause. Brown stains from coffee, tea, tobacco, or tartar can often be removed with a professional cleaning and whitening. Brown spots from decay need a filling, and brown discoloration inside the tooth (such as from fluorosis or trauma) may need treatments like microabrasion, bonding, or veneers. A dentist can tell which type you have.
Can you remove stains without whitening?
Yes. Many stains are removed by physical cleaning, with no bleaching involved:
- A professional cleaning removes tartar and surface stain.
- Whitening toothpaste polishes away surface stains.
- Better brushing and flossing prevent buildup.
Whitening (peroxide) is only needed for deeper or overall discoloration, so a cleaning is often the best first step.
Is professional whitening worth it?
For many people, yes. It’s faster, usually stronger, and supervised, which reduces the risk of irritation. It’s most worthwhile if you have moderate to heavy staining, want quick results, or didn’t get what you hoped for from store-bought products. For mild stains, a cleaning plus whitening toothpaste or strips may be enough and costs less. Whether it’s worth it also depends on your budget and expectations.
How often can I whiten my teeth?
It depends on the product and your teeth. Follow the directions on any over-the-counter product, and leave a gap of several months between whitening courses. Professional treatments are often repeated about every one to two years, with occasional touch-ups at home. Whitening too often can cause sensitivity and may affect enamel, so ask your dentist to recommend a schedule.
How long does it take to remove stains from teeth?
- Professional cleaning: one visit, with visible results the same day.
- In-office whitening: about 60 to 90 minutes.
- Whitening strips: a few days to two weeks.
- Whitening toothpaste: 2 to 6 weeks for subtle results.
- Intrinsic stains: can take weeks or months, depending on the treatment.
Are teeth stains a sign of poor hygiene?
Not necessarily. Poor brushing and flossing can cause stains, but many people with excellent hygiene still have them, because of genetics, aging, medications, or the foods and drinks they enjoy. Stains are common and nothing to be embarrassed about.
Is it safe to remove teeth stains at home?
Generally yes, if you use proven methods and follow the directions: soft brushing, fluoride toothpaste, ADA-approved whitening products, and water rinses. Avoid acidic and abrasive DIY remedies, and check with a dentist first if you have cavities, gum disease, sensitive teeth, or are pregnant.
Do natural remedies like charcoal or lemon juice work?
No. These aren’t recommended. Lemon juice and vinegar are acidic and can erode enamel, and charcoal is abrasive with little proof it whitens. Safer choices are fluoride whitening toothpaste, strips, and professional treatment.
Can I whiten teeth with crowns, veneers, or fillings?
You can whiten your natural teeth, but crowns, veneers, bonding, and fillings won’t change color. That can leave a mismatch. Ask your dentist whether to whiten first and then replace restorations to match.
Conclusion
Removing stains from teeth starts with knowing what you’re dealing with. Surface stains from coffee, tea, and tobacco often respond well to better brushing, whitening toothpaste, strips, and a professional cleaning. Deeper stains inside the tooth usually need professional options like whitening, bonding, or veneers. Whatever route you take, start with the least invasive method, avoid harsh DIY remedies like lemon juice and charcoal, and protect your enamel.
Results last longest when you keep up good habits: brush gently with fluoride toothpaste, clean between your teeth, rinse after staining drinks, and see your dentist regularly. If a stain is sudden, affects just one tooth, or comes with pain, get it checked rather than treating it yourself.
Ready to take the next step? Book a check-up and cleaning, and ask your dentist which option fits your teeth best.
Medical Disclaimer
This article is for general educational purposes only and is not a substitute for professional dental or medical advice, diagnosis, or treatment. Always consult a qualified dentist or healthcare provider about your specific situation, especially if you are pregnant, have dental or gum problems, or experience pain or unusual symptoms. Never ignore professional advice or delay seeking it because of something you have read here.