You’ve found an old ring in a drawer, inherited a chain from a relative, or bought a piece of jewelry from a secondhand seller. Now you’re wondering: is it actually gold? Knowing how to test gold at home can save you from overpaying, help you spot fakes, and show you what a piece is really worth before you sell or insure it.
The good news is that you don’t need a lab or expensive equipment. Simple tools like a magnet, a bowl of water, or an inexpensive acid test kit can tell you a lot.
Quick answer: The most reliable ways to test gold at home are the density test, the magnet test, and an acid test kit. Use at least two methods, and confirm valuable pieces with a professional.
In this guide, you’ll learn how each test works, how accurate it is, and which popular “tricks” you should skip.
Gold Basics Before You Test
Before you start testing, it helps to know what you’re actually looking for. Not all gold is the same, and a piece can be real gold without being pure gold.
What “Real Gold” Means
Pure gold is 24 karat (24K), meaning it’s about 99.9% gold. It’s also very soft, so it bends and scratches easily. That’s why most jewelry is made from gold mixed with other metals like copper, silver, or nickel. These alloys add strength and durability, and they give gold different shades, such as yellow, white, or rose.
So a 14K ring is not fake just because it isn’t pure. It’s real gold, with 58.5% gold content.
Karat and Purity Chart
| Karat | Gold Purity | Fineness Mark |
|---|---|---|
| 10K | 41.7% | 417 |
| 14K | 58.5% | 585 |
| 18K | 75.0% | 750 |
| 22K | 91.6% | 916 |
| 24K | 99.9% | 999 |
Higher karat means more gold, a richer color, and a higher value. Lower karat means a more durable piece that is often cheaper.
Types of Fake or Lower-Value Gold
Many pieces that look like gold fall into these categories:
- Gold plated: a very thin layer of gold over a base metal. It wears off over time.
- Gold filled: a thicker layer of gold bonded to a base metal. It’s more durable than plating but still not solid gold.
- Gold vermeil: a layer of gold over sterling silver.
- Gold overlay: a thin gold layer applied by heat and pressure, similar to gold filled but typically thinner.
- Gold-colored base metals: brass, copper, and other alloys that only look like gold.
Knowing these differences will help you understand your test results later in this guide.
Step Zero: Inspect the Piece
Before you try any test, take a few minutes to look closely at the piece. A careful inspection can often tell you a lot, and it costs nothing.
Check Hallmarks and Stamps
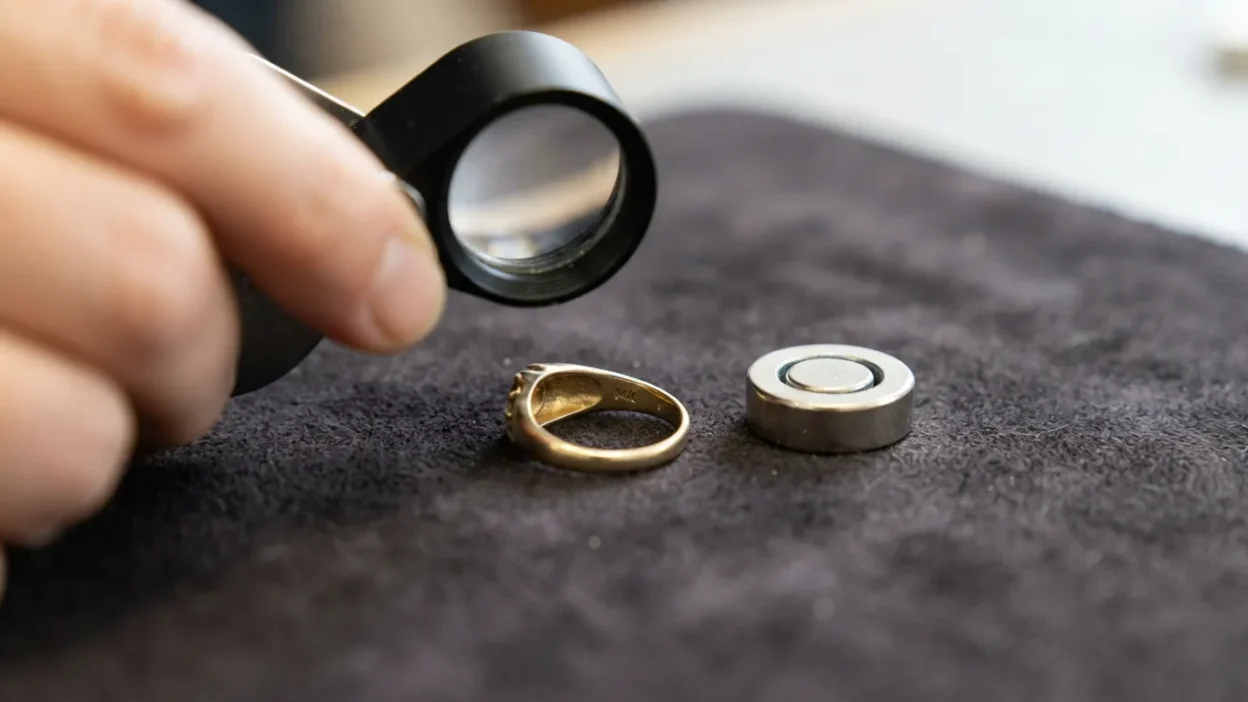
Look for small markings on the inside of a ring band, near the clasp of a chain, or on the back of a pendant. A magnifying glass or jeweler’s loupe makes them easier to read.
Common gold marks:
- Karat marks: 10K, 14K, 18K, 22K, 24K
- Fineness marks: 417, 585, 750, 916, 999
- Plating marks: GP (gold plated), GEP (gold electroplate), HGE (heavy gold electroplate), RGP (rolled gold plate), or “Gold Filled”
You may also see a maker’s mark or a country hallmark.
Keep in mind: Stamps can be faked, so a mark alone doesn’t prove a piece is real. Treat it as a clue, not a verdict.
Visual Signs of Fake Gold
Look closely for these warning signs:
- Worn spots where a different color shows through, especially on edges, corners, and high-contact areas
- Flaking, peeling, or bubbling on the surface
- Green or dark discoloration, particularly around clasps and hinges
- Color that doesn’t match between different parts of the piece
What You’ll Need
Gather these before you move on to the tests:
- Magnifying glass or jeweler’s loupe
- Strong magnet (a neodymium magnet works best)
- Kitchen scale that measures in grams
- Small bowl or measuring cup
- Unglazed ceramic tile
- Gloves and eye protection (for acid testing)
The 10 Home Tests
Now for the main event. Each test below explains what you need, how to do it, what a real result looks like, and how far you can trust it. No single test is perfect, so plan to combine at least two or three.
1. Magnet Test
What you need: a strong magnet (a neodymium magnet works best; a fridge magnet is too weak)
Steps:
- Hold the magnet close to the piece, then touch it directly.
- Watch whether the piece is pulled toward the magnet or sticks to it.
- Test the clasp, hinges, and any other parts separately, since they may contain steel springs.
Real gold result: no attraction at all. Gold is not magnetic.
Accuracy: low to moderate. If the piece sticks, it is not solid gold. If it doesn’t, you’ve only ruled out one type of fake, because brass, copper, and aluminum aren’t magnetic either.
Risk to the item: none.
2. Float (Water) Test
What you need: a bowl of water
Steps:
- Fill a bowl with water.
- Drop the piece in gently.
Real gold result: it sinks right away. Gold is one of the densest metals.
Accuracy: low. It rules out lightweight fakes, but many base metals sink too, so a piece that sinks tells you very little.
Risk to the item: none.
3. Density Test (Water Displacement)
This is the most reliable method you can do at home, because it measures a property that is hard to fake.
What you need: a kitchen scale (ideally accurate to 0.1 g), a small graduated cylinder or measuring cup with fine markings, water, and a calculator
Steps:
- Weigh the piece in grams and write down the number.
- Fill the cylinder partway with water and record the volume in milliliters.
- Lower the piece in so it is fully submerged, without splashing.
- Record the new water level. The difference between the two readings is the piece’s volume (1 mL = 1 cm³).
- Divide the mass by the volume: density = mass ÷ volume.
Reference densities (approximate):
| Metal | Density (g/cm³) |
|---|---|
| 24K gold | 19.3 |
| 18K gold | 15.2 to 15.9 |
| 14K gold | 12.9 to 14.6 |
| 10K gold | 11.4 to 12.9 |
| Brass | 8.4 to 8.7 |
| Copper | 8.9 |
| Silver | 10.5 |
Karat ranges vary because the alloy mix differs (white gold, rose gold, and so on).
Real gold result: a density close to the range for the stated karat. A result well below it suggests a base metal or plating.
Accuracy: high for larger pieces like bars and coins, but only moderate for small items. A tiny ring displaces so little water that a small reading error throws off the result, so measure carefully and repeat the test.
Watch out: tungsten has almost the same density as gold (about 19.25 g/cm³), which is why it’s used in counterfeit bars. If you’re testing bullion, combine this test with dimension checks and a professional test.
Risk to the item: none.
4. Ceramic Scratch Test
What you need: an unglazed ceramic tile or plate (the rough, unfinished underside of a ceramic plate works)
Steps:
- Place the tile on a flat surface.
- Drag the piece firmly across the unglazed surface to leave a streak.
- Check the color of the mark.
Real gold result: a gold or yellowish streak.
Fake result: a black or dark gray streak.
Accuracy: moderate. It’s a quick way to catch obvious fakes, but plating over a gold-colored base can confuse the result.
Risk to the item: it scratches the surface, so don’t use it on valuable, antique, or sentimental pieces.
5. Vinegar Test
What you need: white vinegar, a small glass dish or cup, and a dropper or spoon
Steps:
- Place the piece in the dish, or put a few drops of vinegar on an unnoticeable spot.
- Leave it for 10 to 15 minutes.
- Rinse the piece with water, dry it, and check for any change in color.
Real gold result: no change. Gold doesn’t react to vinegar.
Fake result: discoloration, tarnishing, or a green tint. This suggests the piece contains reactive base metals such as copper or brass.
Accuracy: low. Plating or a thick gold layer can hide what’s underneath, and lower-karat gold contains copper, which might react slightly. Treat this as a supporting test only.
Risk to the item: low, but rinse and dry the piece afterward. Avoid it on pieces with gemstones or pearls, since vinegar can damage them.
6. Skin Test
What you need: nothing, just a piece you can wear for a while
Steps:
- Wear the piece against clean, dry skin for several hours.
- Look at your skin and the piece afterward.
Real gold result: no marks on your skin.
Fake result: a green or black mark on your skin, which usually means the piece contains copper or other base metals that react with sweat.
Accuracy: low. Skin chemistry, sweat, lotions, and perfumes all affect the result. Lower-karat gold with a high copper content can sometimes leave marks too, and a clean result doesn’t prove the piece is real, since a thick plating can last for a while.
Risk to the item: none.
7. Ice Test
This test relies on the fact that gold conducts heat very well.
What you need: an ice cube and a flat piece of gold, such as a coin, bar, or ring
Steps:
- Place the piece on a flat, room-temperature surface.
- Put an ice cube on top of it.
- Compare how fast the ice melts with a second ice cube on a different surface, such as a known plain metal or a plate.
Real gold result: the ice melts noticeably faster on gold than on most other metals.
Accuracy: low. Silver and copper actually conduct heat even better than gold, so a fast melt doesn’t prove the piece is gold. The test also works best on flat items with good contact, so it isn’t practical for chains or thin jewelry.
Risk to the item: none.
8. Sound (Ring) Test
What you need: a second coin or small metal object, and a quiet room
Steps:
- Balance the piece on your fingertip or hang it from a thread so it can vibrate freely.
- Tap it gently with the second coin.
- Listen to the sound.
Real gold result: a clear, high-pitched, ringing tone that lasts a moment.
Fake result: a dull thud or a short, flat clink.
Accuracy: low. It works best on coins and bars, and it takes a trained ear. Different alloys and shapes change the sound, and jewelry rarely rings clearly. You can compare it with a coin you know is genuine, or look up audio samples online.
Risk to the item: low, but tapping can dent soft gold, so be gentle.
9. Nitric Acid Test Kit
This is the classic jeweler’s method, and it’s the most accurate way to check karat at home without electronics.
What you need: a gold testing kit (a touchstone or testing stone, plus bottles of acid labeled for 10K, 14K, 18K, and 22K), gloves, eye protection, and a well-ventilated space
Steps:
- Rub the piece firmly on the testing stone to leave a visible streak. Choose an inconspicuous spot, or file a tiny notch.
- Put a drop of the 10K acid on the streak and watch for a reaction.
- If the mark stays, repeat with the 14K, then 18K, then 22K acid.
- The highest acid that leaves the streak untouched indicates the piece’s karat. If the mark dissolves or turns green, the piece is lower than that karat or isn’t gold at all.
Real gold result: the streak resists the acid that matches the piece’s karat.
Fake result: the streak disappears quickly, often with a milky or greenish reaction.
Accuracy: moderate to high. The weak point is that it tests only the surface. Thick plating can pass, so for pieces you suspect are plated, scratch through the surface to test the metal underneath.
Risk to the item: it leaves a small mark, so skip it on valuable or antique items.
Safety first:
- Wear gloves and eye protection, and work in a ventilated area.
- Keep acids away from children, pets, and food.
- Test over a ceramic or glass surface, never over a countertop that acid can stain or damage.
- Follow the kit’s instructions for storage and disposal.
10. Electronic Gold Tester
What you need: a handheld electronic gold tester (prices range from budget models to professional units costing several hundred dollars)
Steps:
- Calibrate the device following the manufacturer’s instructions, often using a known gold sample.
- Clean the piece so oils or dirt don’t affect the reading.
- Press the probe against the surface and read the result.
- Test several spots and compare the readings.
Real gold result: a reading consistent with the stated karat.
Accuracy: moderate to high, depending on the quality of the device. Cheap testers can be inconsistent, and many only measure the surface, so thick plating can still fool them.
Risk to the item: none. It’s non-destructive, which makes it a good choice for valuable pieces. The tradeoff is the upfront cost.
Test Comparison at a Glance
| Test | Difficulty | Accuracy | Damages Item? | Cost |
|---|---|---|---|---|
| Magnet | Very easy | Low to moderate | No | Low |
| Float | Very easy | Low | No | Free |
| Density | Moderate | High (larger pieces) | No | Low |
| Ceramic scratch | Easy | Moderate | Yes (scratches) | Low |
| Vinegar | Easy | Low | Rarely | Free |
| Skin | Very easy | Low | No | Free |
| Ice | Easy | Low | No | Free |
| Sound | Easy | Low | Slight risk | Free |
| Acid kit | Moderate | Moderate to high | Yes (small mark) | Low to moderate |
| Electronic tester | Easy | Moderate to high | No | Moderate to high |
Best combo for most people: the magnet test as a quick screen, the density test for accuracy, and an acid or electronic test to confirm the karat.
Myth-Busting: Tests That Don’t Work
A lot of gold tests circulate online that sound convincing but don’t hold up. Here are the most common ones to skip.
The Bite Test
The idea is that gold is soft, so real gold will show teeth marks. The problem is that lead, tin, and other soft metals dent just as easily, and many fakes are made from them. Biting hard metal can also chip a tooth, and gold jewelry can be damaged or contain solder that isn’t safe to put in your mouth. It proves nothing and carries real risk.
The Toothpaste Test
This claim says toothpaste will strip fake plating or leave real gold unchanged. In reality, toothpaste is a mild abrasive, so it can scratch or dull genuine gold and wear away thin plating on a real piece. A change in appearance doesn’t tell you what the metal underneath is made of.
The Nail Polish Test
Some people say that nail polish or nail polish remover reacts differently with real and fake gold. There is no reliable chemical basis for this. Any reaction you see is more likely from the polish or the surface finish than from the metal itself.
Why These Myths Stick
They’re cheap, quick, and use things you already have at home. Occasionally they seem to work because a very obvious fake fails any test. But a method that sometimes agrees with the right answer isn’t a reliable one.
Bottom line: stick to the density test, magnet test, and acid or electronic testing, and use professional verification for anything valuable.
Testing Different Forms of Gold
The right test depends on what you’re holding. Here’s how to approach the most common types.
Rings, Chains, and Necklaces
Jewelry is the most common thing people test, and also the trickiest, because it’s small, often hollow, and may be made of mixed materials.
- Start with hallmarks and a magnet. Check the clasp and any springs separately, since steel parts can make a real piece look magnetic.
- Be careful with density. Hollow chains, stone-set rings, and pieces with solder won’t give accurate readings.
- Use acid or electronic testing for karat. Pick an inconspicuous spot, such as the inside of a band or near the clasp.
- Check for plating. Worn edges and clasps are the first places a gold layer fails.
Coins and Bullion Bars
Coins and bars are worth more, so counterfeits are more sophisticated, including tungsten-filled bars with a gold coating.
- Weigh and measure. Compare the weight, diameter, and thickness with the official specifications for that coin or bar. A bar that is slightly off in size is a red flag.
- Run a density test. It’s accurate for larger pieces, but tungsten fakes can pass, so don’t rely on it alone.
- Try the sound and magnet tests. They’re useful for quick screening.
- Get a professional check. For anything of significant value, a dealer can use ultrasonic or XRF testing, which sees inside the piece.
Scrap Gold and Broken Jewelry
Scrap pieces are often mixed in karat, so test each item separately and don’t judge the whole pile by one result. Group pieces by karat before you take them to a buyer.
Dental Gold and Antiques
These deserve extra caution. Dental gold is usually alloyed with other metals, and antiques can lose significant value if scratched or tested with acid. Use non-destructive methods only, or go straight to a professional.
Common Mistakes to Avoid
Even with the right tests, a few errors can lead you to the wrong conclusion. Watch out for these.
Relying on a single test
No home test is perfect. A piece can pass the magnet test and still be brass, or fail the vinegar test because of its copper content. Use at least two or three methods and look for results that agree.
Testing only the surface
Plated and gold-filled pieces can pass surface tests like acid or electronic testing. If you suspect plating, check worn areas, or test a spot where the layer is thinnest.
Using acid on valuable or antique pieces
Acid and scratch tests leave marks. On a family heirloom, an antique, or a high-value piece, that damage can reduce its worth. Use non-destructive methods or go to a professional.
Trusting stamps blindly
A “14K” stamp is a clue, not proof. Fake pieces are often stamped, so always confirm with a test.
Ignoring clasps, solder, and hollow areas
Clasps, springs, and solder joints may contain other metals and skew magnet or density results. Test the main body of the piece, and treat the other parts separately.
Rushing the density test
Small errors in weight or water level have a large effect on small items. Measure carefully, repeat the test a few times, and average your results.
Safety Guidelines
Most home gold tests are harmless, but acid testing needs real care. Follow these precautions.
Handling acids
- Wear protection. Use chemical-resistant gloves and safety goggles. Acid can burn skin and permanently damage eyes.
- Ventilate the area. Work near an open window or outdoors, because fumes can irritate your lungs.
- Protect your workspace. Test over a ceramic tile or glass dish, never directly over a countertop, wood, or fabric.
- Keep a rinse source nearby. If acid touches your skin, rinse with plenty of running water right away. If it gets in your eyes, rinse for several minutes and seek medical help.
Storage and disposal
- Store acids in their original labeled bottles, tightly closed, in a cool place away from sunlight.
- Keep them out of reach of children and pets, and away from food and drink.
- Don’t pour leftover acid down the drain. Follow your kit’s instructions and your local hazardous waste rules for disposal.
Protect the piece, too
Before you use anything destructive, ask yourself whether the piece is valuable, antique, or sentimental. If so, choose a non-destructive method or a professional.
When to Take It to a Professional
Home tests are useful for screening, but they have limits. In some situations, a professional test is the safer and smarter choice.
Situations that call for an expert
- Before selling. If you’re about to sell a piece, a certified test confirms its karat and weight so you know what it’s worth.
- High-value pieces. For expensive jewelry, coins, or bars, a wrong result could cost you a lot.
- Antiques and heirlooms. Professionals can test without damaging the piece.
- Conflicting results. If your home tests disagree, don’t guess. Get a definitive answer.
- Insurance or appraisal. You’ll usually need a written valuation from a qualified appraiser.
Who can test it
- Jewelers and goldsmiths can test karat and spot plating.
- Reputable gold dealers and buyers often test for free when you’re selling.
- Independent appraisers or assay offices provide certified results and documentation.
Methods professionals use
- XRF (X-ray fluorescence): a fast, non-destructive scan that reads a piece’s metal composition.
- Ultrasonic testing: checks the inside of bars and coins for fakes like tungsten cores.
- Fire assay: the most precise method, used for refining, though it destroys a small sample.
Choosing a trustworthy tester
- Check reviews and credentials, and ask how they test and what they charge.
- Get a second opinion before accepting a lowball offer.
- Be cautious of anyone who pressures you to sell on the spot.
Step-by-Step Testing Workflow
Not sure where to start? Follow this order, moving from the safest tests to the most definitive.
- Inspect the piece. Look for hallmarks, worn plating, and color differences. Use a loupe if you have one.
- Run the magnet test. If it sticks (apart from the clasp), it isn’t solid gold. Stop here.
- Do the density test. Weigh the piece, measure the water it displaces, and compare the result with the density chart.
- Confirm the karat. Use an acid kit or an electronic tester on an inconspicuous spot. Skip acid on valuable pieces.
- Check for plating. Test a worn area or a hidden spot to make sure the surface isn’t hiding a base metal.
- Get a professional opinion. If the piece is valuable or your results don’t agree, have it verified before you buy, sell, or insure it.
Rule of thumb: a piece should pass at least two tests before you treat it as real gold.
Frequently Asked Questions
Does real gold stick to a magnet?
No. Pure gold and standard gold alloys aren’t magnetic. If a piece sticks firmly to a strong magnet, it isn’t solid gold. Keep in mind that a piece that doesn’t stick isn’t automatically real, because brass, copper, and aluminum aren’t magnetic either. Clasps and springs may also contain steel, so test the main body of the piece.
Can you test gold with vinegar?
You can, but it’s one of the less reliable methods. Real gold doesn’t react to vinegar, while some base metals discolor or turn green. Thick plating can hide a fake, and lower-karat gold contains copper that may react slightly, so use it only to support a stronger test.
How can you tell gold-plated from solid gold?
Look for worn spots on edges, clasps, and corners where a different metal shows through. Then use a density test or an acid test on a worn area. Hallmarks like GP, GEP, or “Gold Filled” also signal that a piece isn’t solid gold.
What is the most accurate way to test gold at home?
The density (water displacement) test is the most reliable home method, especially for larger pieces like coins and bars. For checking karat, an acid test kit or a good electronic tester works well. Combining two or more methods gives the best results.
Can gold be fake and still have a hallmark?
Yes. Fake pieces are often stamped with marks like 14K or 585 to look genuine. Treat a hallmark as a clue and always confirm it with a test.
Do gold jewelry tests damage the item?
It depends on the method. The magnet, density, float, skin, ice, and electronic tests don’t harm the piece. The ceramic scratch test and acid test leave small marks, so avoid them on valuable, antique, or sentimental items.
How do I know if my gold is 14K or 18K?
Check the hallmark first: 14K is usually stamped 14K or 585, and 18K is stamped 18K or 750. To confirm, use an acid test kit or an electronic tester. 18K gold also tends to look richer in color and feel heavier than 14K gold.
Conclusion
Learning how to test gold at home gives you a quick, low-cost way to screen a piece before you buy, sell, or insure it. Start with a careful inspection, then use the magnet test as a quick check, the density test for accuracy, and an acid or electronic test to confirm the karat. Skip the bite, toothpaste, and nail polish myths, which don’t tell you anything reliable.
Remember that no single home test is perfect. A piece should pass at least two tests before you treat it as real, and anything valuable, antique, or sentimental deserves a professional opinion.
Found this guide helpful? Save it for later, share it with someone who has old jewelry lying around, and subscribe for more practical how-to guides like this one.