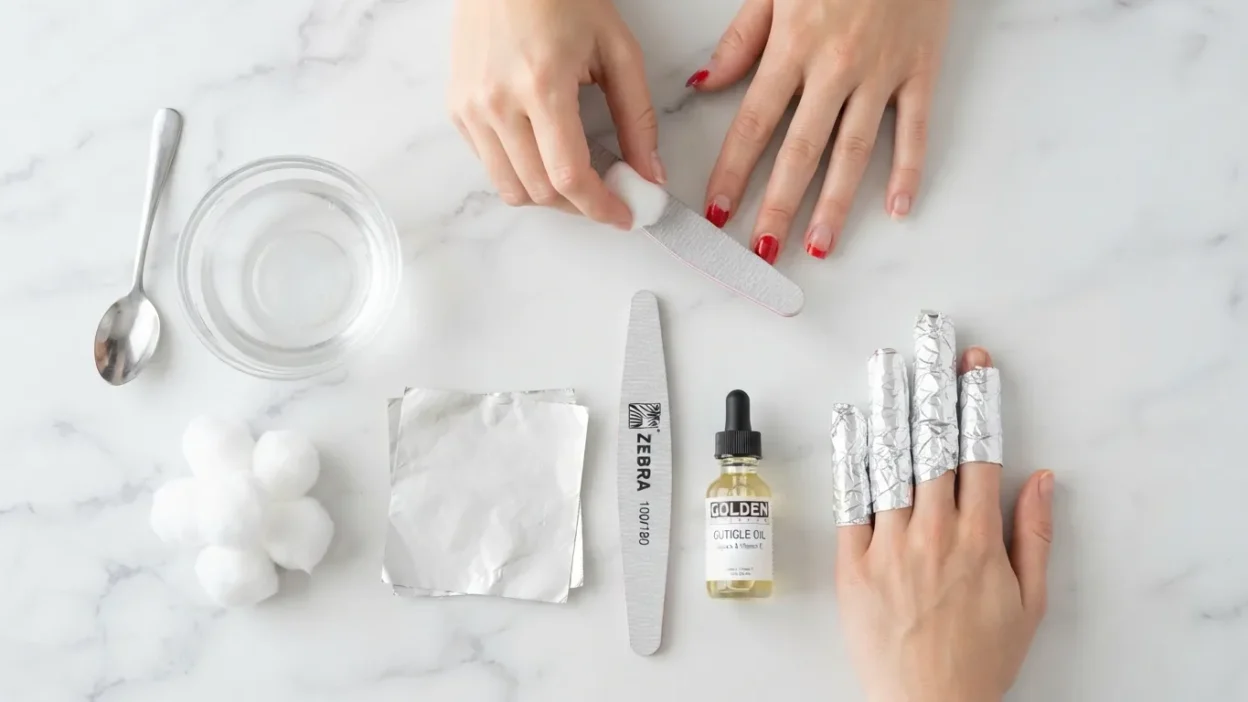
It’s tempting when a corner starts lifting — just grab it and pull. But acrylic bonds tightly to the surface of your natural nail, and when you peel it off, you’re not just removing the acrylic. You’re pulling away the top layers of your nail plate along with it. Nails are made of thin, stacked layers of keratin, and each one you strip off leaves the nail underneath thinner and more exposed.
The damage isn’t always obvious right away. In the short term, you might notice raw, tender nail beds or nails that feel unusually flexible and weak. Over time, repeated peeling leads to visible ridging, white patches, splitting, and nails that break or bend far more easily than they used to. In more severe cases, picking can even create small tears in the nail bed that leave it vulnerable to infection.
This is exactly why nail professionals and dermatologists both recommend the soak-off method instead. Acetone dissolves the acrylic’s chemical bond gradually, so it releases on its own rather than being torn away — protecting the nail plate underneath.
What You Need Before You Start
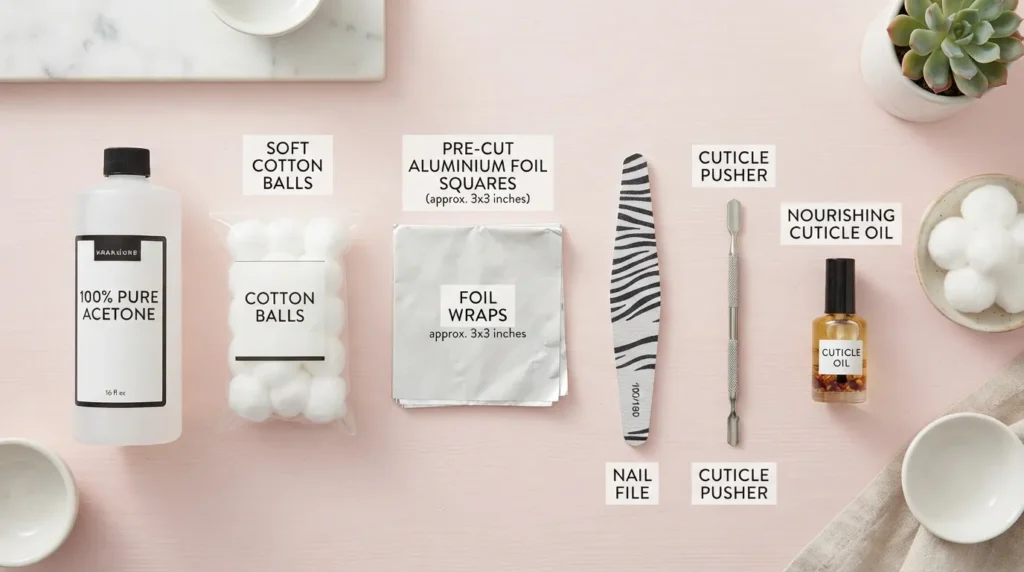
Good removal starts with the right supplies — gathering everything ahead of time means you won’t be interrupted mid-soak trying to find a missing item.
Full supply list:
- 100% pure acetone
- A glass or ceramic bowl
- Cotton balls or cotton pads
- Aluminum foil, cut into small squares
- A cuticle pusher or orangewood stick
- A nail file (coarse grit) and a buffer (fine grit)
- Cuticle oil or a rich hand cream
- Petroleum jelly or Vaseline (optional, for skin protection)
- Nail clippers
Acetone vs. non-acetone remover: This is the one substitution you can’t make. Regular nail polish remover is formulated to be gentle, which means it’s too weak to break down the hardened polymer in acrylic. Pure acetone is a stronger solvent that actually dissolves the acrylic’s structure — anything less will leave you soaking for far longer with little progress.
Glass or ceramic vs. plastic bowls: Acetone is harsh enough to degrade certain plastics over time, causing them to warp, cloud, or leach into the acetone. A glass or ceramic bowl holds up to repeated use without reacting.
Optional tools: If you have access to one, an electric nail file can speed up the initial buffing step, though it should be used carefully to avoid over-filing. Some people also swap foil for reusable plastic soak-off clips, which clamp the cotton in place without needing to be wrapped and discarded each time.
Pre-Soak Prep Steps
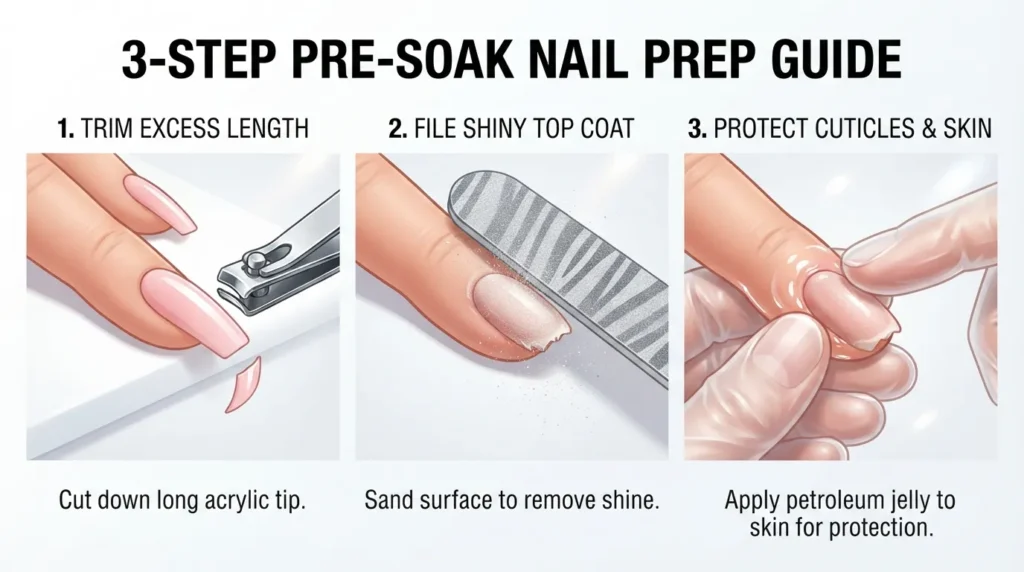
A little prep work before you even open the acetone makes the entire process faster and gentler on your nails.
Trim your nails down. Use a nail clipper to cut the acrylic as short as you comfortably can. Less material means less time soaking, and shorter nails are easier to manage once the acrylic starts to soften.
Buff off the top seal coat. This step is non-negotiable. Acrylic (and any polish or top coat over it) has a hard, glossy surface that acts like a barrier — acetone can’t penetrate it efficiently. Using a coarse file, gently buff across the surface of each nail until the shine is gone and it looks matte and slightly textured. You’re not trying to file through the acrylic itself, just break its seal so the acetone can get underneath and start dissolving it. Skipping this step is the most common reason people end up soaking for an hour with barely any progress.
Protect your skin and cuticles. Acetone is dehydrating and can leave the surrounding skin dry, cracked, or irritated with prolonged contact. Dab a bit of Vaseline or a thick cream around your cuticles and the skin bordering each nail before you begin. This creates a barrier so the acetone stays focused on the acrylic rather than soaking into your skin.
Set up a ventilated workspace. Acetone fumes are strong, especially once you have ten fingers wrapped and soaking at once. Work near an open window or with a fan running, and lay down a towel to protect your surface from drips.
Step-by-Step Soak-Off Method
With prep done, it’s time for the actual soak. This is the part that takes patience — but getting each detail right here is what makes the difference between a smooth removal and a frustrating one.
Soak the cotton correctly. Take a cotton ball or a piece of cotton pad and saturate it fully in pure acetone. It should be wet enough that a little acetone could be squeezed out, but not so soaked that it’s dripping everywhere. Too little acetone and the cotton dries out before it’s done its job; too much and it just runs off your finger.
Wrap each nail. Press the saturated cotton directly onto the nail, covering the entire nail bed. Wrap a small square of foil tightly around the fingertip to hold the cotton firmly in place. The foil does double duty here — it keeps the cotton from shifting and traps in warmth, which helps the acetone work faster. Repeat this for all ten fingers.
Let it sit. Give your nails 15 to 20 minutes for average-thickness acrylic, or closer to 30 minutes if the acrylic is thick or has been on for a long time. Try not to check too early — unwrapping and rewrapping repeatedly just lets heat and acetone escape.
Use heat to speed things up. If you want to cut down soak time, slip your wrapped hands into a plastic bag, or cover them with a pair of old socks or a warm towel. The added warmth helps the acetone penetrate and soften the acrylic more quickly.
Check for readiness. Unwrap one finger — ideally the one you wrapped first, since it’s had the most time. The acrylic should look bubbled, cloudy, or slightly wrinkled, and should feel soft rather than hard when you press on it gently. If it still feels solid, rewrap that finger and give it more time.
Removing the Softened Acrylic
Once a nail passes the readiness check, it’s time to actually take the acrylic off — carefully.
Scrape gently, don’t force it. Use a cuticle pusher or an orangewood stick and apply light, steady pressure in small sections, working from the base of the nail toward the tip. Properly softened acrylic should lift away almost effortlessly, coming off in small flakes or soft chunks. If you feel any resistance at all, stop — that section isn’t ready yet.
Signs it needs more time vs. signs it’s ready. Acrylic that’s fully softened will look opaque, slightly raised, and feel mushy or gel-like under the pusher. If it’s still glossy, hard, or firmly attached, don’t push through it — rewrap that nail with a fresh, fully saturated piece of cotton and give it another 10 minutes. Trying to power through unsoftened acrylic is where most at-home damage happens.
Dealing with stubborn spots. It’s normal for acrylic to soften unevenly — often the edges near the cuticle or side walls take longer than the center. For any patch that’s lagging behind, hold a small acetone-soaked cotton piece directly on just that spot for a few extra minutes rather than re-soaking the entire nail.
Common mistakes to avoid here:
- Scraping aggressively or repeatedly over the same spot, which can thin the natural nail underneath
- Digging the pusher under the nail plate to “pop” off a stuck section
- Rushing to the next finger before a section is actually soft, leading to picking instead of scraping
Work through each finger this way, moving at the pace your nails need rather than a fixed timer.
Alternative/Faster Methods
The foil-wrap method is the most controlled way to remove acrylics, but it’s not the only option. Depending on your skin sensitivity, the thickness of your acrylic, or how much time you have, one of these alternatives might work better for you.
Acetone-soak bowl method. Instead of wrapping each finger individually, pour enough pure acetone into a glass bowl to fully submerge your nails, then dip your fingertips in and soak for 15 to 30 minutes. This method tends to work a bit faster than foil wraps since all ten nails are soaking simultaneously with full contact, but it also exposes more of your skin to the acetone, which can be more drying. You can set the glass bowl inside a larger bowl of warm water to gently heat the acetone and speed things up further — just avoid direct heat sources like a microwave, since acetone is flammable.
Electric file or drill-assisted removal. A nail drill can be used to mechanically file away acrylic instead of relying on acetone at all, or to speed up the initial seal-breaking step before soaking. This method is faster, but it comes with real risk — it’s easy to file too deep and damage the natural nail plate underneath, especially without training. If you go this route, use a fine-grit bit, keep the drill moving constantly, and stop well before you reach the natural nail.
Warm acetone method. Gently warming acetone (via a bowl-in-bowl setup, never direct heat) can cut soak time noticeably, since heat accelerates the chemical breakdown of the acrylic. This pairs well with either the foil or bowl method — just handle warmed acetone carefully, as it’s still flammable and the fumes become stronger when heated.
Which method fits your situation:
- Thick or long-worn acrylic → bowl method or warmed acetone, since full submersion works faster on heavier product
- Sensitive or easily irritated skin → foil wraps, which limit acetone contact to just the nail
- Limited time → warmed acetone bowl method, the fastest of the three
- No acetone tolerance at all → electric file method, used cautiously and ideally with practice on a spare nail first
Aftercare for Damaged or Weak Nails
However carefully you remove your acrylics, your natural nails will likely feel a bit worse for wear afterward — thinner, drier, and more fragile than usual. That’s normal, and with the right aftercare, they bounce back within a few weeks.
Buff ridges smooth. Once all the acrylic is off, lightly go over each nail with a fine-grit buffer to even out any rough patches or leftover residue. Keep this light — you’re smoothing the surface, not thinning the nail further.
Start a hydration routine immediately. Acetone strips moisture from both the nail and surrounding skin, so rehydrating is the priority. Massage cuticle oil into the nail bed and cuticles daily, and follow up with a rich hand cream, ideally applying both morning and night. Look for oils with jojoba, vitamin E, or argan oil, which absorb well and support the nail as it recovers.
Consider a strengthening treatment. A ridge-filling base coat or a keratin-based nail strengthener can help reinforce the nail while it regrows and thickens back up. Apply these under any polish you wear during the recovery period.
How long recovery takes. Surface-level dryness and roughness typically improve within a week or two of consistent moisturizing. Full nail regrowth — meaning the nail plate returning to its normal thickness — takes longer, generally 3 to 6 months, since that’s roughly how long it takes a nail to grow out from base to tip.
Give your nails a break before reapplying anything. If your nails feel especially thin, brittle, or sensitive, it’s worth going polish-free for at least a week or two before putting on a base coat, gel, or new acrylics. This gives the nail plate a chance to reharden and rehydrate without added stress.
Special Situations
Not every removal is a straightforward set of ten plain acrylic nails. Here’s how to handle a few common variations.
Removing acrylics with gel polish or dip powder on top. If your acrylics were finished with a gel top coat or a layer of dip powder, you’ll need a bit more filing before you soak. Gel and dip powder are also acetone-resistant but tend to be tougher to break through than a standard acrylic seal. Spend extra time buffing the surface until it’s fully matte with no shiny patches left — any remaining gloss will resist the acetone and add significant time to your soak.
Removing acrylics without acetone. If you have a skin sensitivity or allergy to acetone, mechanical filing is really the only alternative, since no acetone-free product will effectively break down acrylic. This means gradually filing the acrylic down in thin layers using a coarse file or electric drill until it’s gone. It’s slower and carries a higher risk of over-filing into the natural nail, so go slowly, check your progress often, and stop the moment you see or feel the natural nail surface underneath.
Removing acrylics on very short or already-damaged nails. If your natural nails are already thin, cracked, or lifting underneath the acrylic, be extra conservative with both filing and scraping. Stick to the gentlest method — foil wraps with minimal buffing — and resist the urge to rush, since these nails have less of a buffer before you hit sensitive, exposed nail bed.
What to do if a nail is lifting or looks infected underneath. Occasionally you’ll uncover a nail that looks discolored (often green, yellow, or white), feels soft or spongy, or has a foul smell once the acrylic is removed. This can indicate a fungal or bacterial infection that developed in the gap between the acrylic and natural nail. Don’t apply any new product over it — leave the nail bare, keep it clean and dry, and see a doctor or dermatologist for treatment.
Safety Precautions
Acetone is effective precisely because it’s a strong chemical solvent — which means it deserves a bit of respect and care while you’re using it.
Ventilation and fume exposure. Acetone fumes are strong-smelling and can cause lightheadedness or headaches if you’re breathing them in for an extended period, especially with ten fingers wrapped and soaking at once. Work in a room with an open window or a fan running, and avoid doing this in a small, enclosed bathroom.
Protecting your skin. Beyond the pre-soak Vaseline barrier, be mindful of prolonged, direct skin contact with acetone — it strips natural oils quickly and can leave skin dry, cracked, or irritated, particularly if you already have sensitive or eczema-prone skin. If you notice redness, stinging, or excessive dryness during the process, take a short break and reapply a protective layer before continuing.
Avoid acetone on broken skin. If you have any cuts, hangnails, or open irritation around your nails, acetone will sting and can slow healing. Cover these spots with a small dab of petroleum jelly or, if the break is significant, avoid soaking that finger and address it separately after.
Fire safety. Acetone is flammable, so keep it away from open flames, lit candles, or any heat source you might be using to warm it. If warming your acetone, stick to the bowl-in-warm-water method rather than a stove or microwave.
Pregnancy and heightened sensitivity. If you’re pregnant or have a known sensitivity to strong chemical fumes, do this in a very well-ventilated space, keep sessions shorter, and consider taking breaks between hands rather than soaking all ten fingers at once. When in doubt, check with your doctor.
When to See a Professional Instead
DIY removal works well for most people, but there are moments when it’s genuinely safer — and often less frustrating — to hand things off to a professional.
Signs of fungal or bacterial infection. If you uncover discoloration (green, yellow, or white patches), a soft or spongy texture, swelling, or an unpleasant odor once the acrylic comes off, this points to an infection that developed underneath. This isn’t something to treat with more acetone or a new coat of polish — it needs medical attention, ideally from a dermatologist.
Nails that won’t budge after repeated soaking. If you’ve gone through several soak-and-scrape cycles and the acrylic still isn’t lifting, forcing it further usually does more harm than good. Extremely thick, old, or improperly applied acrylic can be genuinely difficult to remove safely at home, and a nail tech has tools and experience to finish the job without stripping your natural nail.
Acrylic applied over already-damaged nails. If you know your natural nails were weak, cracked, or thin before the acrylic went on, removal is riskier than usual — there’s less healthy nail plate to protect. A professional can assess the nail underneath as they go and adjust their approach, which is harder to judge on your own.
You’re not confident in the process. If you’re nervous about handling acetone, unsure whether something looks “ready,” or simply don’t want to risk your natural nails, there’s no downside to booking a professional removal. It typically costs far less than a full acrylic application and takes the guesswork out entirely.
Common Mistakes to Avoid (Recap List)
A quick recap of the missteps that cause the most damage — worth reviewing before you start:
- Using regular nail polish remover instead of pure acetone. It’s too weak to break down acrylic and will leave you soaking far longer with little to show for it.
- Skipping the filing/sealing step. Without buffing off the glossy top coat first, acetone can’t penetrate efficiently, no matter how long you soak.
- Prying or peeling instead of soaking longer. If acrylic isn’t lifting easily, the answer is more soak time, not more force — forcing it strips layers off the natural nail.
- Scraping the same spot repeatedly. This thins the nail plate just as much as peeling does, even though it feels more “controlled.”
- Digging under the nail plate to pop off a stuck section. This is one of the fastest ways to cause pain and lasting damage.
- Rushing to the next finger before a nail is actually soft. Impatience leads to picking, which undoes the whole point of the soak-off method.
- Skipping aftercare. Walking away with dry, unmoisturized nails right after acetone exposure slows recovery and leaves nails more prone to breaking.
- Reapplying polish or new acrylics too soon. Nails need a little recovery time before taking on more product, especially if they came out of the process feeling thin or sensitive.
FAQ
How long does it take to soak off acrylic nails?
Most acrylics take 15 to 30 minutes to soften enough for removal, depending on thickness and how long they’ve been worn. Thicker or older acrylic, or nails with a gel top coat, can take closer to 30–40 minutes, especially if the initial filing step was rushed.
Does soaking off acrylic nails hurt your natural nails?
The soak-off method itself, done correctly, is safe and shouldn’t damage your nails. Damage happens when people skip steps — not filing the seal first, not soaking long enough, or scraping and prying instead of letting the acetone do the work. Patience is what protects the nail underneath.
Can I use nail polish remover instead of acetone?
No. Standard nail polish remover is formulated to be gentle and won’t break down the hardened acrylic polymer effectively. You need 100% pure acetone for the process to work in a reasonable amount of time.
How do I speed up the soaking process?
Buffing the top seal coat thoroughly before soaking makes the biggest difference. Beyond that, trapping heat — through foil wraps, a warm towel over wrapped hands, or gently warming the acetone in a bowl-in-warm-water setup — noticeably cuts down soak time.
Can you soak off acrylics with dip powder or gel on top?
Yes, but expect it to take longer. Gel and dip powder are also acetone-resistant, so extra time spent buffing the surface matte before soaking is essential — any remaining shine will slow the acetone’s penetration.
Is it bad to soak off acrylics too often?
Frequent acetone exposure, even done correctly, can be drying to both the nails and surrounding skin over time. If you remove and reapply acrylics often, make cuticle oil and moisturizer part of your regular routine, and consider giving your nails periodic breaks to recover.
Conclusion
Removing acrylic nails at home doesn’t have to mean risking damage to your natural nails — it just means respecting the process. Break the seal with a proper filing, saturate thoroughly with pure acetone, and give it enough time to do the work. The nails that come out of this looking healthy are almost always the ones that were soaked patiently rather than rushed or forced.
Once your acrylics are off, treat your natural nails gently for a week or two: keep them moisturized, avoid jumping straight into a new set, and let them recover their strength. Whether you’re taking a break from acrylics or just switching up your look, doing the removal right sets you up for healthier nails the next time around.